It’s Week 3 of the Strippy Improv Holiday Quiltalong!

This week we’re making 2 more blocks - for a grand total of 4! Small quilts make it easy to stay on track in a QAL, especially in November/December!
Last week, I talked about piecing the blocks and shared some tips for success.
This week I’m focusing on adding the reverse applique block background.
Here are my 4 best tips:
1. If you’re feeling like your background fabric might be just a little bit too light and your piecing might show through, don’t worry! There’s a solution! BEFORE you fuse your traced shape to the back of the fabric, fuse a piece of light interfacing. I like Thermoweb Lightweight Fusible Interfacing. Then add your shape on top and cut out - this extra layer helps to avoid fabric showing through.

2. Don’t forget to trim around your traced shape on the fusible adhesive. I often forget this step because I’m so excited to get to the point of adding the background! What I mean by this - after you’ve traced your shape onto the fusible adhesive square, cut out roughly 1” beyond your traced line. You don’t need to keep the entire fusible square on the back! Make sure you do this BEFORE you fuse it to your background square.

3. After you cut out the shape on your background square, audition your placement. Move the background square up and down and side to side (slightly), and see which position creates the best looking block. And always make sure that your raw ends from the strippy improv piecing are covered!

4. Choose your decorative stitch and thread color carefully. So far, I’ve used 3 different stitches - a simple straight stitch along the edge of the reverse applique, a zig zag, and a buttonhole stitch. Any decorative stitch works, but here are the things I consider in making my choice. If this quilt will be used (table runner, as opposed to a less-handled wall hanging), I’ll generally choose zig zag because it’s sturdier. I like a loose zig zag in a thread color that coordinates with the block background so that it generally fades away instead of creating a bold outline, but that’s just me. Buttonhole stitch adds a certain charm, which works well with some fabrics (I think it would look fantastic on the holly and berries!). I’ll be honest, I often resort to straight stitch because it’s the easiest and the fastest. :)

I’ve created a YouTube video this week as well - you can view it here. In addition to talking about adding the reverse applique block backgrounds, I offer a few more embellishment ideas (including some fun options for the snow globe!).
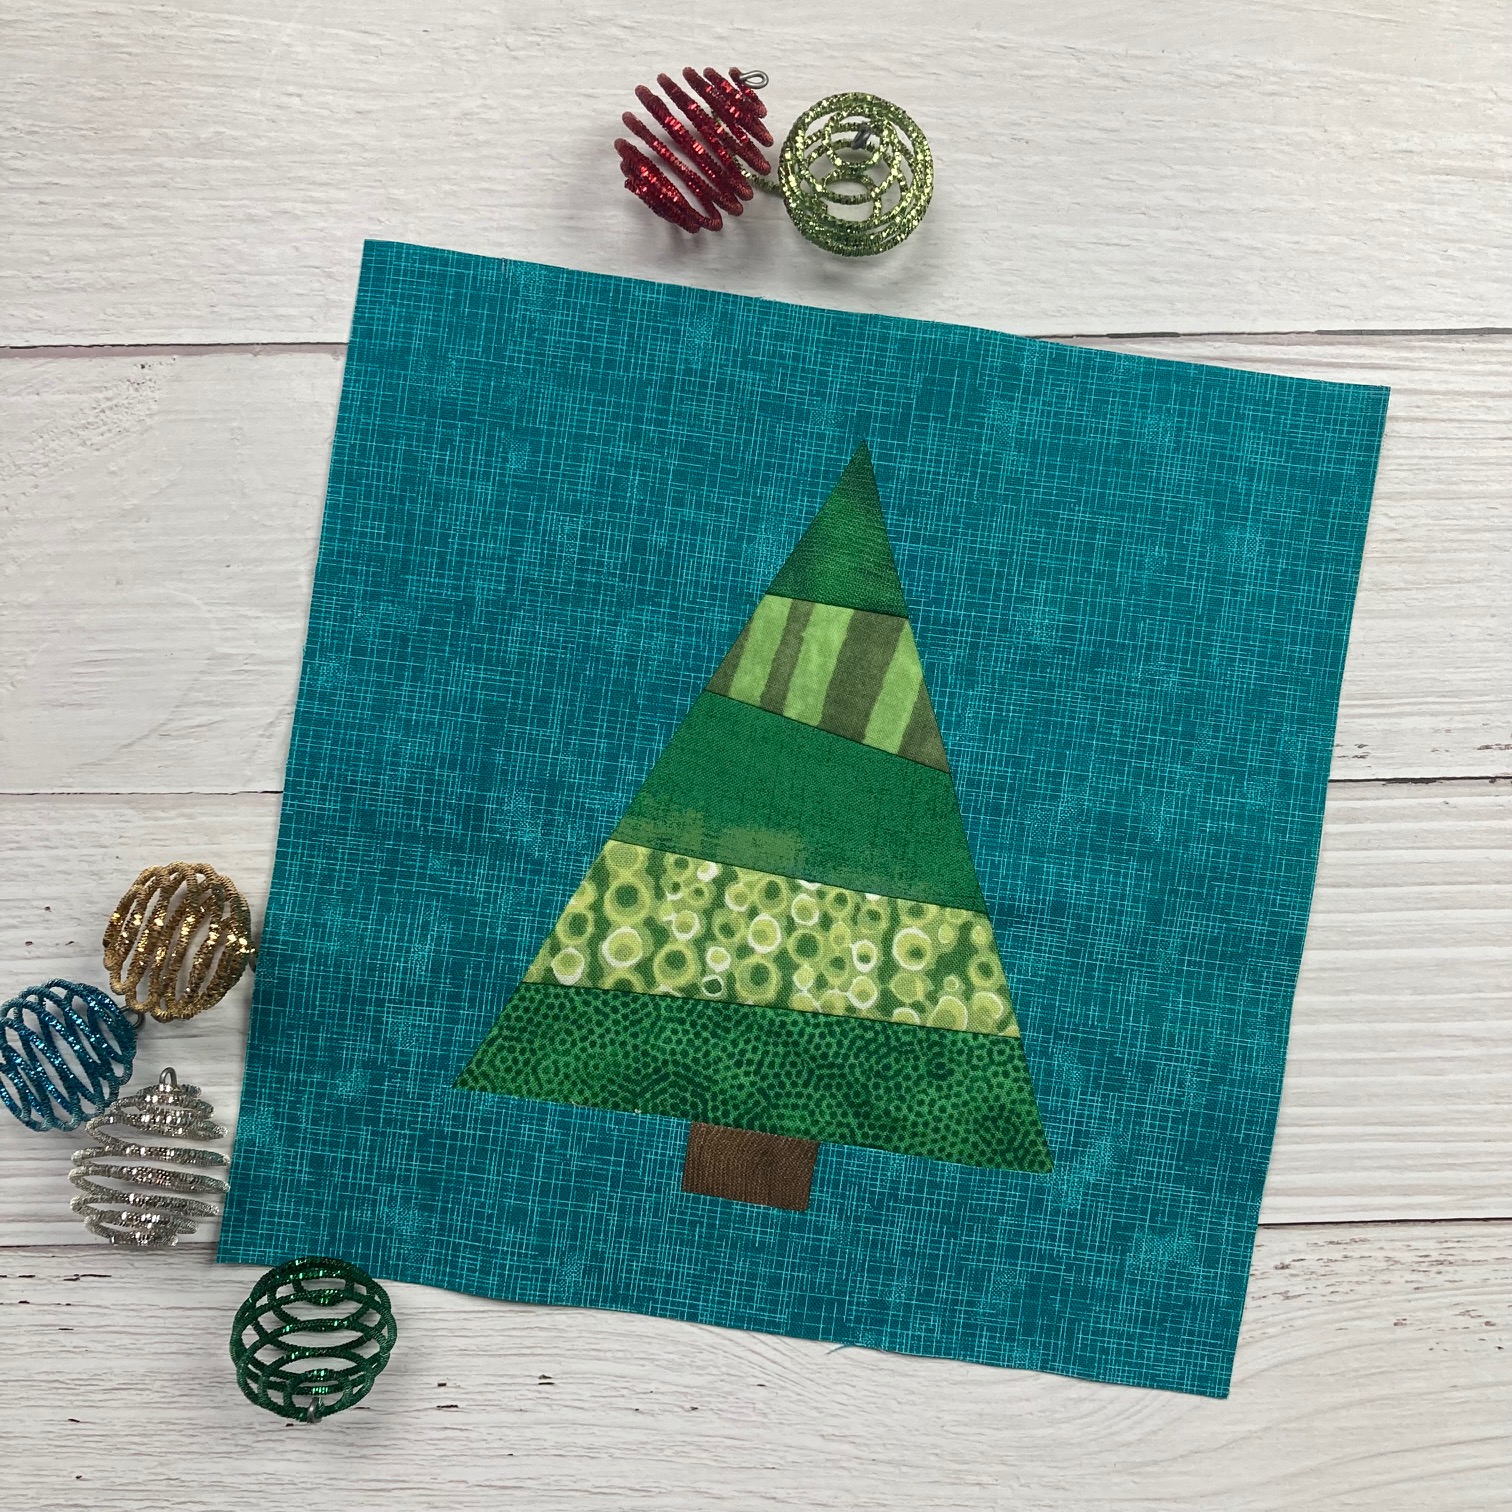
Oh, and here's my finished snowman block!

Next week, we'll talk assembly and finishing! Can you believe we're almost done?
(And if you're not caught up - no worries - next week I'll also share some ways to finish single block projects - great for gifts!
****************************************************************************
Join the Strippy Improv Holiday Quilt Along!
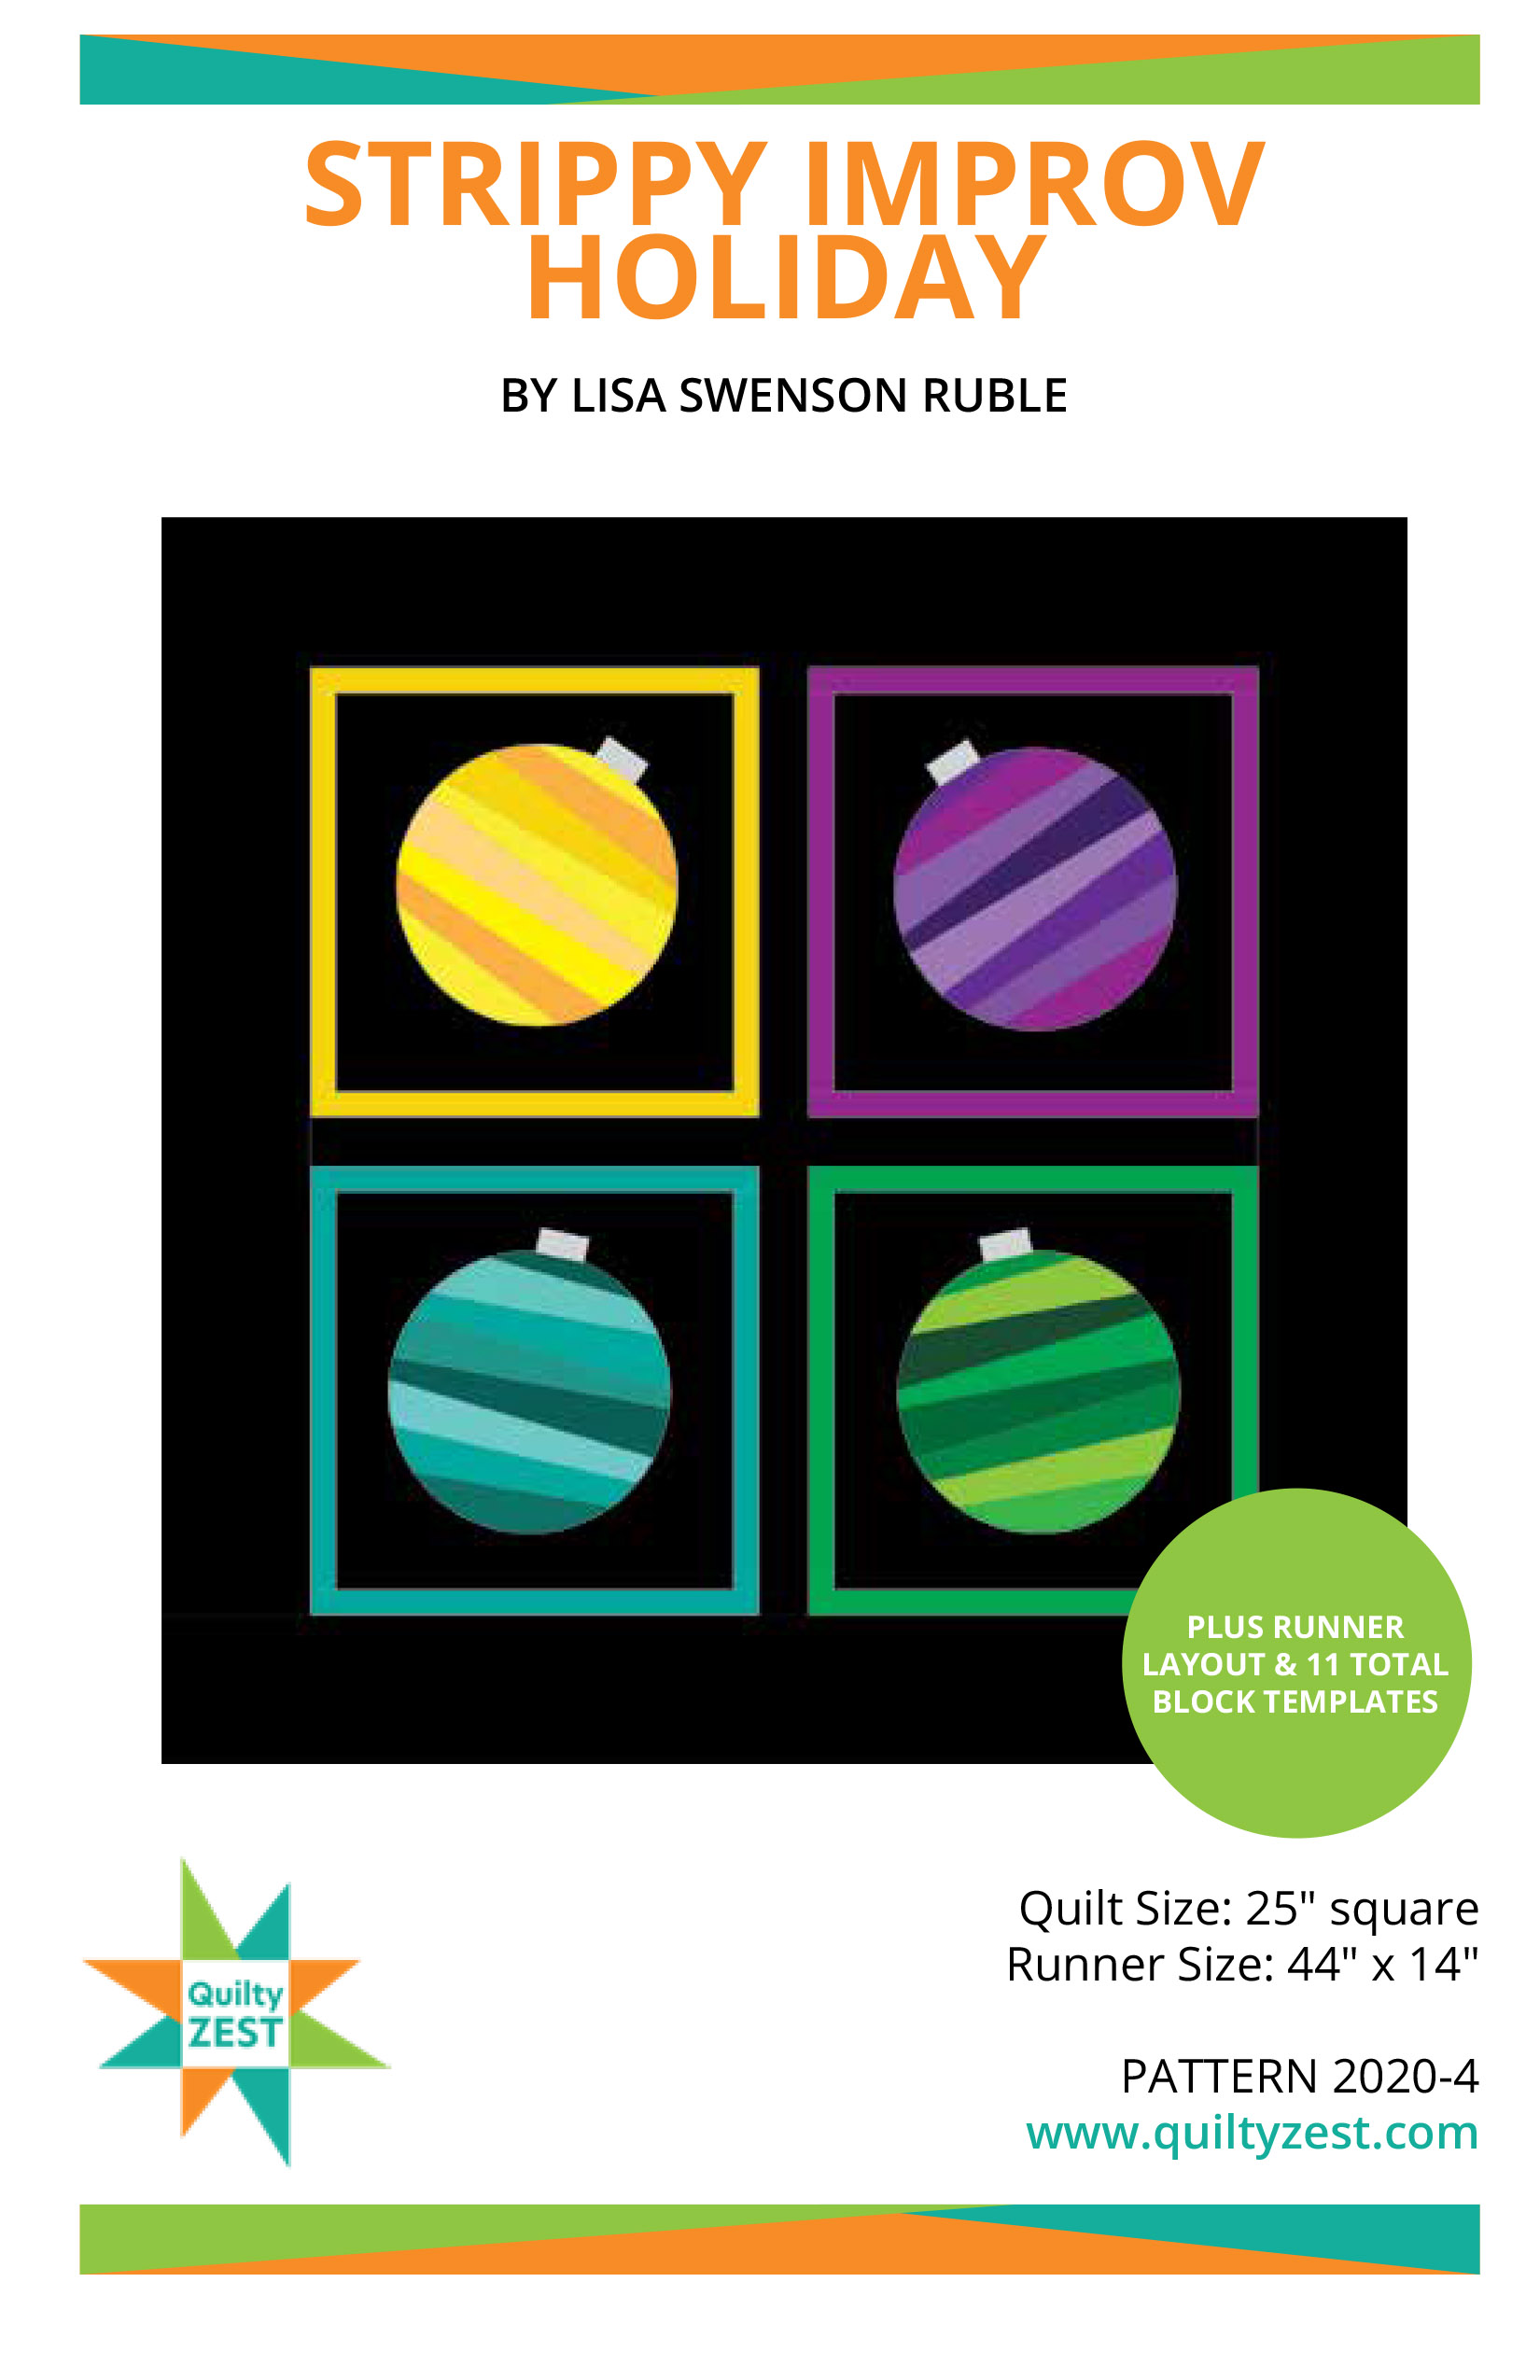
Get the pattern here. It includes all 11 blocks. If you've purchased the pattern previously, you can get the 6 new blocks for free - sign up for my newsletter here, and you'll receive an email with a link to download the new blocks.
QAL Details:
Sew along with me to create a holiday wall quilt or table runner before Christmas! I'll post once a week with tips and advice (plus that all-important accountability!) to keep us on track. These blocks are addicting...just wait and see!
Purchase the pattern here.
Week 1: November 16th - Fabric and block selection
Week 2: November 23rd - Making 2 blocks
Week 3: November 30th - Making 2 blocks
Week 4: December 7th - Assembly and Finishing