Thursday, April 28, 2022

Off the Rails Table Runner

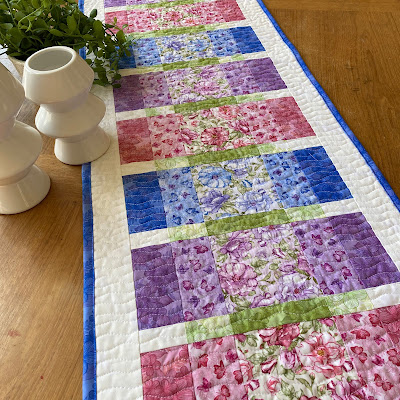
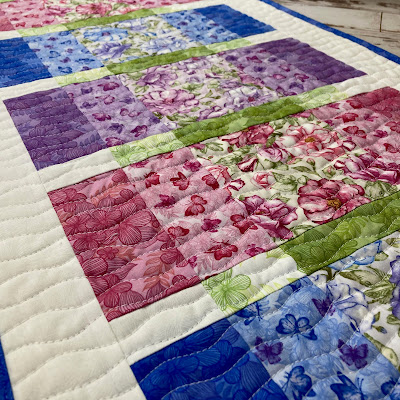
Welcome to my stop on Benartex's Judy's Bloom hop! I'm the first to admit that I don't typically gravitate toward soft floral prints, but when I saw the Judy's Bloom collection by Eleanor Burns for Benartex, I knew exactly what I'd use them for. I really love the watercolor effect of these fabrics. 


 I have long admired the look of watercolor-style quilts, and I thought these fabrics would work really well in that blended type of effect. 

The result? My latest pattern, the Off the Rails Runner.
(Keep reading for details about the FQ bundle giveaway of Judy's Bloom, plus a discount code for the pattern. Mother's Day is around the corner...hint hint)

The light, medium and dark prints blend beautifully into each other. 


This pattern works well with tonal prints in varying shades as well. For this Modern Blender version, I used the Color Weave basics collection, also from Benartex. The key is to have a light, medium and dark of each color. 


Aren't these colors gorgeous?


To celebrate my pattern launch, I'm offering a 25% off discount code through 5/1. Head to my Etsy shop and use code JUDY25 at checkout. 
Purchase the pattern here.

And the giveaway! Benartex has generously offered a FQ bundle of Judy's Bloom fabrics for me to give away. To enter, leave a comment below letting me know which colorway of the fabrics you prefer. (Note: Make sure I have a way to contact you!). For a second entry, head over to my IG account (@lisaswensonruble), follow me, and leave a comment letting me know you did on the Off the Rails runner post. Giveaway ends Sunday, 5/1/22, at 11:59 pm EDT. US entries only, please. 

And don't miss the rest of the hop:
Tuesday
Thursday
Sandra at MMM Quilts
Friday 
Tammy at Tamarinis

If you're new here, welcome! I hope you'll stay and look around a bit. 
If you like what you've seen here, you can also find me:
To find all of my quilt patterns, visit my Etsy shop
Find me on IG here.
Find me on Facebook here.
Sign up for my newsletter in the right-hand sidebar or here
(You'll receive a free pattern for my Diamond Drama quilt (below) as a thank you!)


Wednesday, April 20, 2022

Trinity Rainbow Banners

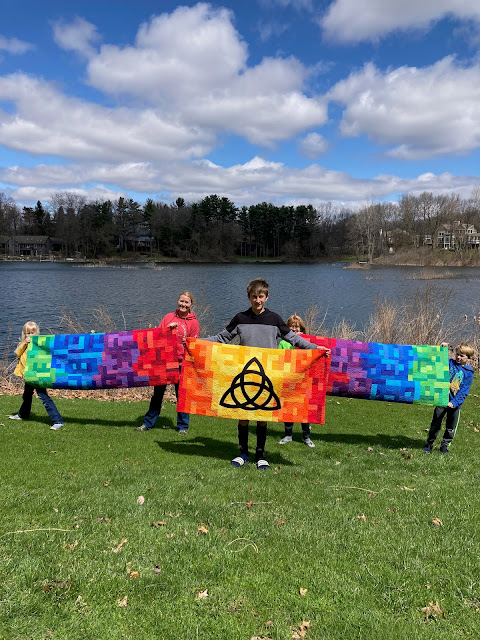
This past winter, my church, Trinity Lutheran in Kalamazoo, asked me to create some new banners to hang in the sanctuary. I put together some designs, and we decided on what you see below. I'm thrilled with how they turned out!

 
This style of quilt is based on the Rainbow Cross quilt I made for Castle Church back in 2019, so I knew just how to get started: lots of improv pieced slabs in a rainbow of colors.  If you want to see a tutorial on assembly line slab piecing, click here.


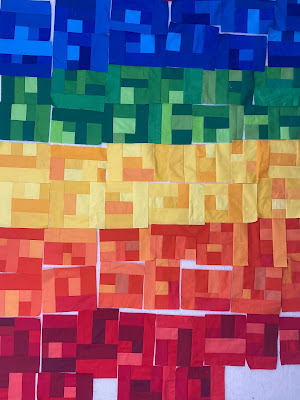
Once I had slabs constructed, I started laying them out on my design wall. I assemble them into horizontal rows, and then join the rows. The random patchwork helps to "hide" the appearance of the rows so that it looks more cohesive. 

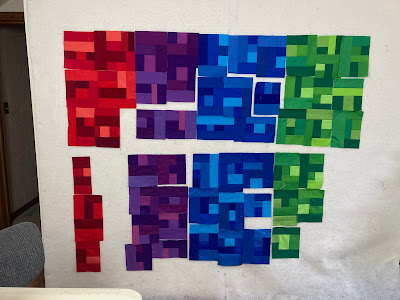
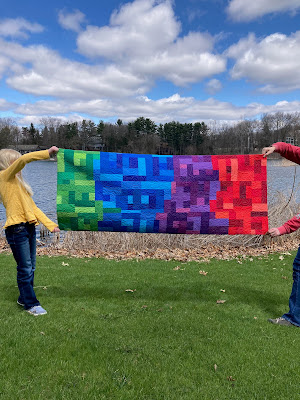
I did the same with the red, purple, blue and green section. The different here is here is that I had to make two, and I wanted them to have a fairly similar amount of each color, so I built both on the wall at the same time so I could compare them. 

The finished pieces:

When I made the Rainbow Cross quilt, I put together a time-lapse video of arranging the quilt on my design wall. You can watch it here

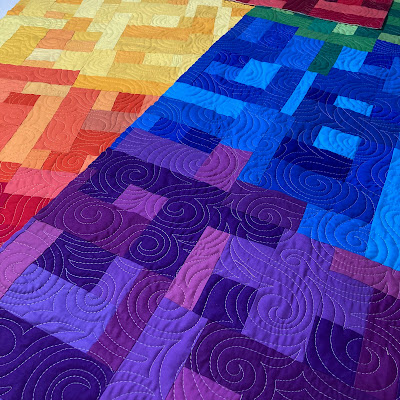
Diane Oakes machine quilted all three panels, beautifully as usual. Look at that gorgeous texture! 

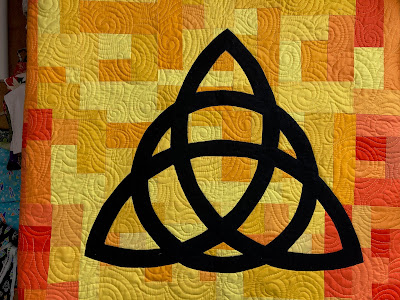
The finishing touch was adding the celtic knot on the center panel. I used Thermoweb HeatnBond Lite Fusible Adhesive to apply the shape with raw edge fusible applique, and then I zigzag stitched the edges to secure them. 

I didn't want the "line" of a binding around the edge, so I used a facing technique. It had been a while since I'd done a facing, so I followed this excellent tutorial

The results, outside int the sun before hanging: 
The vibrancy makes my heart sing!


I was honored to create these banners and enjoy seeing them hang in the church.


If you're new here, welcome! I hope you'll stay and look around a bit. 
If you like what you've seen here, you can also find me:
To find all of my quilt patterns, visit my Etsy shop
Find me on IG here.
Find me on Facebook here.
Sign up for my newsletter in the right-hand sidebar or here
(You'll receive a free pattern for my Diamond Drama quilt (below) as a thank you!)


Thursday, April 14, 2022

Modern Tulips Flange Binding Tutorial

Happy spring! Today I'm sharing a tutorial for this Modern Tulips wall quilt over on the Thermoweb blog. This project is made using raw edge applique, and then I quilted it with freehand wavy lines. I finished the project off with a flange binding so I could have that little pop of pink! I'm sharing how to add the flange binding below. 

But first, I wanted to show a few other color variations I played with. 
I really liked the gradated effect in my original design, so I tried two grayscale versions. Black and gray tulips aren't super typical, but I like how they pop off the bright background!

I also auditioned some multicolor versions. I like the idea of using different shades of the same color to add a little interest and dimension to the bloom. The white background totally changes the look, doesn't it?


Back to the flange binding! 

You'll Need:
(2) 1-1/2" x WOF strips for the main color (black for me)
(2) 1-3/4" x WOF strips for the accent color (pink for me)

Make the Binding:
Step 1 Join the black strips into a long strip using a diagonal seam. Repeat with the pink strips.

Step 2 Sew the black and pink strips together. Press seam toward the narrower strip (black).

Step 3 Press the strip in half, matching raw edges on the long side. This will create a thin line of pink on the black side of your binding strip.

Step 4 Sew the binding strip to the back side of the quilt, with the accent color facing up. Miter corners as you work around the quilt.


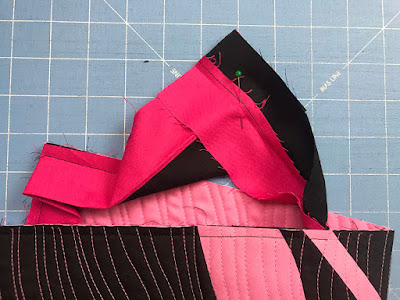
Step 5 When you join the ends of the binding strip, align the seam between the strips. Put a pin in place to mark the spot where they align, and make sure you stitch though that spot as you join the strips.

Step 6 Double check to see how your seams lined up before trimming off the seam allowance. If they don't align, you can rip out the stitches and try again. When you're satisfied with the join, trim the seam allowance and finish stitching the binding to the back side of the quilt. 

Step 7 Press the binding away from the back of the quilt. Press to the front, miter corners, and secure binding in place with binding clips. 

Step 8 Stitch on the pink flange with matching thread to secure the binding in place.

 And you're done! Hang up your wall quilt and enjoy! Don't forget - you can find the full Modern Tulips Wall Quilt here.

______________________________________________________________________________

Love tulips? Check out my Tulip Row quilt pattern here


If you're new here, welcome! I hope you'll stay and look around a bit. 
If you like what you've seen here, you can also find me:
To find all of my quilt patterns, visit my Etsy shop
Find me on IG here.
Find me on Facebook here.
Sign up for my newsletter in the right-hand sidebar or here
(You'll receive a free pattern for my Diamond Drama quilt (below) as a thank you!)

Monday, April 11, 2022

Nursery Blog Hop: Rhombi quilt + baby block tutorial + pattern sale~


I'm excited to be part of Michael Miller's Nursery Blog Hop! 
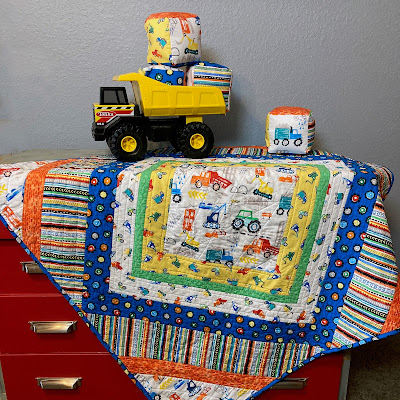
I have three boys at home, and while none are babies anymore (the youngest is 7), construction-themed fabric is right in my wheelhouse. When I saw the Diggers and Dumpers collection, I knew it would be perfect in my Rhombi quilt pattern. (10% off through 4/14!) 

How cute are these prints? I love the bright primary colors.


Purchase the Rhombi quilt pattern here. (10% off through 4/14)


My Rhombi quilt pattern highlights a large focal print--in this case, the construction equipment in the center and corners. Add in a few brightly colored prints (I especially love using a stripe), and this quilt sews up so quickly! I stitched this quilt top in one afternoon. The finished quilt measures 45" square.


I couldn't resist making baby blocks with the remaining fabric. That large focal print was just begging to be fussy cut for block sides! Keep scrolling for the tutorial to sew the baby blocks. 


And the perfect finishing touch? That cozy Minky on the back. My boys are fighting over who gets to use this quilt. 

Baby Block Tutorial
With prints these fun, who can resist sewing some stackable stuffed blocks? Adding a layer of interfacing helps the blocks to keep their shape. 

Here's how:

You'll Need: (to make 4 blocks)
1/2 yard focal print to fussy cut
1/4 yard each four coordinating prints
Fiberfill
Fabric marking pen

Cutting:
From the focal print:
Fussy cut (8) 5-1/2" squares, each centering a motif

From the four coordinating prints:
(4) 5-1/2" squares from each print

From the Interfacing:
(24) 5-1/2" squares

Make the Blocks:
Step 1 Following manufacturer's directions, fuse an interfacing square to the wrong side of each fabric square. 


Step 2 Using a fabric marking pen, mark a dot 1/4" from each corner of each square. These will be your starting and stopping points for stitching. 

Step 3 Join six squares together as shown, starting and stopping on the corner dots. Back stitch at starting and stopping points to secure the stitches. The four squares in a horizontal row will become the "tube" and the top and bottom squares will become the top and bottom of the block. 

Step 4 Pin raw edges together to start forming a block shape, making sure to align corner dots. 

Step 5 Stitch pinned edges from dot to dot, creating an open box shape as shown. Don't forget to backstitch at starting and stopping points!
Step 6 Pin and sew the remaining edges, leaving a 3" opening along the last side for turning. 

Step 7 Turn the block right side out and using a turning tool to poke corners out as much as possible. Stuff firmly with fiberfill and handstitch the opening closed. Tip: Use a thimble to help push the needle through the interfacing. 


I really enjoyed sewing a couple cute projects using these fun fabrics! 

If you're new here, welcome! I hope you'll stay and look around a bit. 
If you like what you've seen here, you can also find me:
To find all of my quilt patterns, visit my Etsy shop
Find me on IG here.
Find me on Facebook here.
Sign up for my newsletter in the right-hand sidebar or here
(You'll receive a free pattern for my Diamond Drama quilt (below) as a thank you!)