Monday, May 27, 2013

Capturing a Story in a Quilt

I recently got back a few pieces that had been hanging in my Grandma's apartment and thought it would be fun to share one of them. I made this back in 2002 for a challenge put on my Quilting Arts magazine. I can't even tell you anymore what the theme of the Challenge was, but I do remember that I had to send in a slide of my project, which seems so archaic now! 

My piece, which measures about 14" square, is a collage of all my favorite memories from my high school church youth group. 

When I created this piece, I'd been sewing for quite a while but had only made three quilts, all fairly traditional. I pretty much made this up as I went along. I definitely appreciate how far I've come, technique-wise, since I made this, but it still makes me happy to look at!

Here are some close-ups and some descriptions of what's going on in the piece:

Our youth group took summer trips, mixing service and camping, each summer. Here you see a mountain (we took trips to Wyoming and Colorado, as well as Tennessee and Michigan while I was in the group), a campfire, and whitewater rafting. The paintbrush represents a service trip where we painted a school's gym, and I have it "painting" the river. (Yes, I was into beading at that point too!)

A favorite game of the group was Capture the Flag. Here's the flag represented here.

We had a softball team, and we held a spaghetti dinner as a fundraiser each year. (I was also playing with multimedia at the time, and the fork is Tyvek painted silver and hit with a heat gun to make it shrivel.) The ice cream cone: a local custard shop, Kopp's, was our weekly hangout. I still go there every time I'm in town--delicious!


 Another fundraiser were homemade sub sandwiches sold after the church services. This was the 3-D part of my block! I stuffed each piece and then sewed them together.

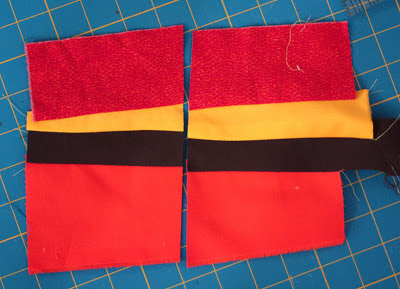
The church itself is probably my favorite part of the piece. I pieced tiny strips of different reds/burgundies to fashion the brick and then added some embroidery stitching for mortar. To the left, you'll see a bus (how we traveled on the summer trips), and an outhouse and green tent (both from the camping). The bucket and hose represent car washes, another fund raiser.

More current sewing project posts to come this week, but I thought this was fun to share, and I'm on vacation, so not much sewing is going on at this actual moment! 


Thursday, May 23, 2013

Shades of Gray Quilt: My Blogger's Quilt Festival Entry

Shades of Gray and Green
45.5" x 54.5"
Pieced and quilted by me

In a mad dash of sewing the past few days, I managed to cross two things of my list at once. I finished my Shades of Gray quilt, made using charm squares from a swap I hosted last August. This gave me a new quilt to enter in the Blogger's Quilt Festival and meant that I'd finished my May Lovely Year of Finishes Goal (9 days early!!). Hooray!

I'm entering my Shades of Gray and Green quilt in the...you guessed it!...two-color quilt category. The quilt is made up of 5" squares--120 of them--and then each square has one cathedral window-style green corner, which creates the curve. I'll post a tutorial on how I did it next week. I used three different greens for the corners.
 For the quilting, I free motion quilted three wavy lines through each gray diagonal "stripe." It looked like it was missing something, so I quilted sort of a curved zigzag through the green diagonal stripes as well. Because it's a charm square quilt, there was so much going on with the fabrics that I didn't want the quilting to stand out.
My inspiration for this design came from this quilt by Megan at Tales of Ineptitude. My original plan for the charm squares had been to make half-square triangles with gray and green, and then do some sort of chevron design. But when I saw Megan's red and gray quilt, I changed my mind. I really liked the effect of the smaller colored corners.
 It's been raining all week here, so yesterday I dodged the raindrops and wandered through my neighbors' backyards looking for photography options. So if you see puddles in any photos, that's why. Happily, my quilt dried quite nicely after its rainy morning adventure!

The backing is a gray and white pin dot that I bought on a Frugal Friday from the Quilting Lodge.

If you haven't already, head over to Amy's Creative Side to check out the entries in the Blogger's Quilt Festival. It's like your own personal quilt show!


Also linking up to the Year of Lovely Finishes, which prompted me to (start and) finish this quilt during the month of May, and Fabric Tuesday at Quilt Story.

Wednesday, May 22, 2013

WIP Wednesday: Texas Teardrops

It's the third week in May and I just got started on the Texas Teardrops Quilt Along back from the beginning of April; so basically that means things are proceeding as usual around here!

I love Vicki's Texas Teardrops quilt--great pattern, gorgeous fabric choices, and fantastic quilting. But when she offered the Sew Along, I hesitated, because I don't do applique. (Similar to how I "don't do windows"... I know how, but,  um, I'd rather go to the dentist than do it.)

But I really did like the pattern!
So I decided to make it more appealing to sew by reducing it in size. My blocks measure 7" in size, and I'm making a table runner. Fewer blocks, smaller blocks. Do-able.

Here are my first four:

I picked textured tonals from Fabri-Quilt's Marblehead and Northcott's Stonehenge collections for the "teardrops" and used low-volume tonals from my stash for the background, something I've been itching to try on a project for a while now. 


And my original rough idea, which then morphed into doing low-volume four-patches. (Seeing this photo, I'm wondering if I should have stuck with squares rather than four-patches?)


Here's what I don't like about applique: The lines aren't straight, so you can't use a ruler, and you draw/trace/cut the same.line.over.and.over. Ugh.

But Vicki recommended using a smaller rotary cutter to cut out the fabric shapes (scary!), so I tried it. I was surprised that it was pretty easy and actually kind of fun. Not to mention fast!

Four blocks down, six (or more) to go...and I'm late to the party, but I'm having fun!

Of course, the next step is stitching the shapes down, which means tracing the same shapes over and over again, but I just like to think of that as good machine quilting practice!


Tuesday, May 21, 2013

Ombre Chevron Cutting Recap

A while back, Karen had left a comment asking if I could show how I did the cutting for the ombre chevron quilt I made during Sew Fine Fabric's Sew Along.


Better late than never (where did the first two-thirds of May go?!?!), here it is.

I don't have any of the fabric left to demo on, so I'll show you what I did using the photos I have from the project.

 So you've got your (hopefully less wrinkled than mine) ombre dot fabric, still folded in half, with selvedges together. I cut 6" strips, similar to the orange lines on the photo below. (The actual tutorial calls for 7", but I chose 6" instead.)

Starting by the selvedges, I cut each strip into 6" squares. If you look at the squares in this photo, you'll see there are a lot more with very few dots. That's okay--you'll have some extras if you're going for a look like mine.

Then I sorted the cut squares into three piles:
1. Squares cut from near the selvedges of each strip, which were my "darks" (or very dotted).
2. Squares cut from the middle of each strip, which were my "mediums." If you look in the photo above, my "mediums" came from both the 2nd and 3rd rows.
3. Squares cut from the upper section of each strip, which were my "lights" with very few dots.

Like I mentioned, you'll end up with more of the lights and mediums than darks--it's just the nature of the fabric design. Which is why my finished quilt only has two dark chevron rows and 2.5 each of the light and medium chevron rows.

Karen (and anyone else, I hope that helps!) Let me know if you have additional questions.


Friday, May 17, 2013

Loosey Goosey Quilting

I finished quilting my Tea Towel Challenge project today! 
Because of the linen towel in the center, the whole project is pretty, for lack of a better word, loose. Basically, the hemmed edges of the towel were tighter than the center of the towel, so there are some spots that are almost baggy. (I'm really making this sound appealing, aren't I?!). 
Which just meant that when I quilted it, it still felt loose. Happily, it hangs pretty straight. 

As several people suggested, I quilted wavy lines below each line of text. I quilted along the outer edges of the towel, and then I did a few rounds of large zigzag quilting in the brown and and outer border, trying not to compete with all the piecing. I like it!

Linking up with Confessions of a Fabric Addict's Can I get a whoop whoop! and Crazy Mom Quilts' Finish It Up Friday.


Saturday, May 11, 2013

Shades of Gray Update

I've been surrounded by green and gray! My quilt will have 120 blocks in it; each block now looks like this:

Are you wondering what the heck I'm doing? It's not just a green corner on each block; instead, I'm doing Cathedral Window-style corners. So I've folded each 3-1/2" green square diagonally in half and then basted the raw edges to a corner of a gray square.

My shortcut? Since I cut the green squares in pairs from a strip, I kept them doubled up and pressed two squares on the diagonal at a time. Not as sharp of a fold line, sure, but not a problem and definitely a time saver!

I like my original diagonal layout, but I played with a few others as well--you never know what you might end up liking!

Here's the original (though all the blocks are done now; apparently I just didn't take a photo?)


A (blurry) flying geese layout:
I was thinking if I did this one that I'd put green strips between each column of geese.

And a two-block layout:

I am now folding back the green folded edge and topstitching it on each block. I contemplated waiting to do that until after I'd assembled the quilt but ultimately decided against it because I didn't want to deal with the starts and stops. I'm just being cognizant of where each curve ends so it doesn't get cut off in the seam allowance when I join the blocks. We'll see how it works...

Oh, and my mom, who participated in the Shades of Gray swap as well, is using this same technique with teal solids. I'll share photos of hers as well--it'll be fun to see a different color scheme!


Tuesday, May 7, 2013

May Lovely Year of Finishes Goal: Shades of Gray Quilt!

Last August I hosted a Shades of Gray Charm Square Swap. Which means that since last September, I've had a pile of lovely gray 5" squares sitting patiently in my studio, joined by four green solids shortly afterward.


Not anymore! Finishing this quilt top is my May goal for the Lovely Year of Finishes challenge. I'll share more about the process in future posts.

Had these two projects next to each other on the design wall--talk about going from super bright to a much more controlled color palette!

Monday, May 6, 2013

Joseph and the Technicolor Dream Coat meets an Irish blessing

And if that's not the most unusual blog header I've ever written, I don't know what is!

Back in January, Victoria over at 15 Minutes Play put out a Tea Towel Challenge.

I bought this tea towel, which spend the next 4 months sitting in my studio, gazing woefully at me.

My husband's family is Irish, and I've always liked this blessing, and I had the vague notion of creating made fabric in various shades of green and thens sewing Drunkard's Path blocks that would frame the tea towel and represent the rolling hills of Ireland.

I got this far and it just wasn't working for me.


I think I may have been "greened out" after the Emerald Challenge. I was also struggling with adding brown and green so close to the brown and green border on the towel itself. 

So I decided to go bright instead. I pulled solids and wanna-be solids and (loosely) grouped them in warm and cool color combos.

I tried to do some wavy piecing of some of the strips--something I always admire and can't quite seem to make happen myself.

Building the border:

And more:

And more:


 I had planned on an inner brown border, but again it was too close to the border on the tea towel, so I created a tiny pieced border first out of the scraps from the outer border.
Seeing these tiny bright scraps chain pieced together just made me happy!

And the result:

Now you understand the title of this blog post--it's very bright and technicolor-y!

I am unsure about quilting this one--specifically the tea towel part, as it's a bit loose and stretchy, and I don't want to distract from the words. I'd welcome any suggestions!