Happy Christmas in July! That's always fun to say when it's sunny and 80 degrees outside. :)
The Benartex Ambassadors were asked to create a Christmas in July project using a holiday line. I'm sharing two - one here, and one available for newsletter subscribers only (subscribe here!).
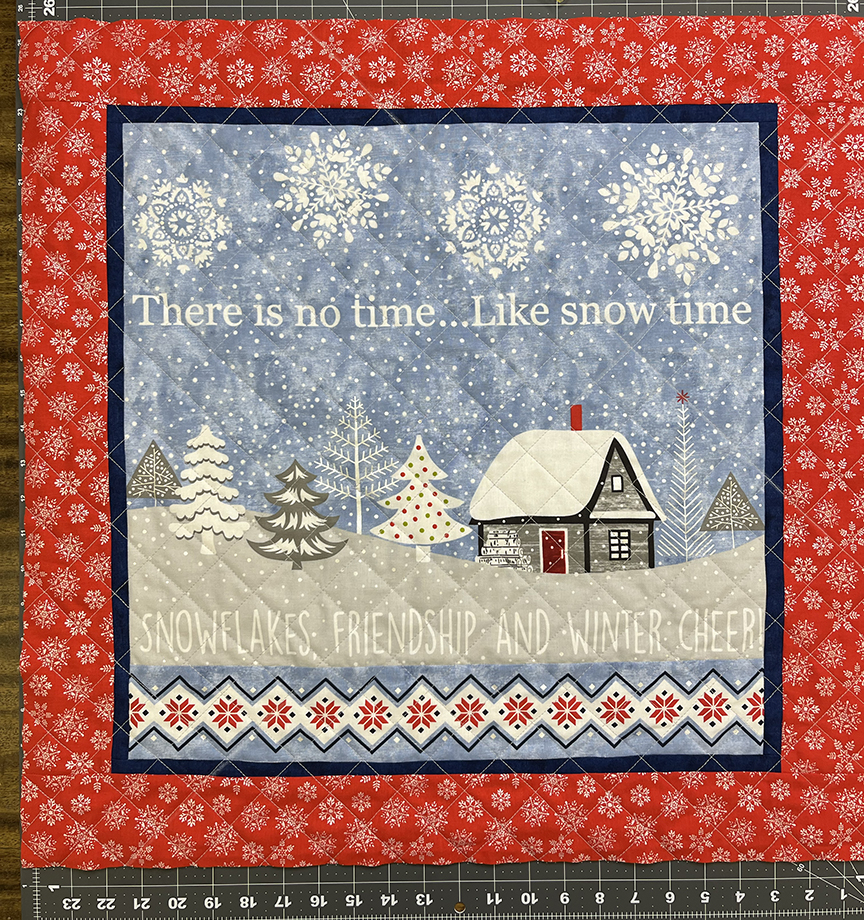
I chose the Nordic Cabin collection by Cherry Guidry. I love Cherry's style, and the snowmen are adorable! I also like holiday projects that are winter themed rather than Christmas so I can leave them up through January and February as well.
When I saw the panel and the way it was split in half, I knew it would be perfect for two large throw pillows. We keep 24" square pillows in our family room for lounging on the floor, and I'm excited to use these this coming winter.
Materials:
1 Nordic Cabin panel
1/8 yard each Shadow Blush Navy and Lime
2/3 yard red snowflake print
1-1/2 yards backing fabric
(4) 27" squares of batting
(2) 20" zippers
I started out by trimming the panel. I'll share my measurements, but yours may vary slightly - it's more important to cut the panel on the lines you want than to match my measurements. Note that my panel was NOT prewashed. A couple panel trimming tips:
- Pay attention to printed lines and remember to account for seam allowances. On this panel, for the snowman image, I purposely cut the bottom edge so the navy stripe was in the bottom 1/4". This way it will be hidden in the seam allowance, rather than just having a thin line show.
- Don't be married to your ruler. You may need to gently pull on the fabric or slightly readjust your ruler as you cut to follow a line or the edge of an image.
- If your cut piece sizes vary, you can always even things out with your border - I'll show you how!
Cut panel:
Top cabin section: trim to 18-3/4" wide x 16" high.
Middle snowman section: trim to 18-3/4" square
Bottom stripe: trim to 18-3/4" wide x 3-1/4" high
Additional Cutting:From each of the Navy and Lime:
(2) 1" x WOF strips
From the red snowflake:
(6) 3-1/2" x WOF strips
From the background print:
(2) 25" squares
Making the Pillows:
Step 1 Sew the fussy-cut stripe strip to the bottom of the fussy-cut cabin piece. This should measure 18-3/4" square. (If your measurements are different, just make sure your piece is a square.) See both panel pieces below.
Step 2 Sew 1" x WOF navy strips to opposite sides of the cabin square. Press out and trim excess. Sew remaining strip pieces to the top and bottom. Repeat with the lime strips on the snowman square.
Tip: When adding strips to a panel, keep the panel on top. This allows you to be able to see any printed lines you're trying to follow as you stitch. As you see below, I'm stitching so the navy and the white line are in my seam allowance rather than showing on my pillow front.
Step 3 Cut (2) 3-1/2" x WOF red snowflake strips in half. Sew strips to both sides of each pillow square, press seams out, and trim excess. Sew the remaining 3-1/2" x WOF red snowflake strips to the top and bottom. Trim excess. Your pillow tops are complete - that easy!
Step 4 Layer each pillow top with a batting square and baste in place. Quilt as desired. (I used a 1-1/2"-wide crosshatch pattern). Square up pillow to measure 24" square. Note that pillow top is slightly oversized to account for shrinkage while quilting. In the same way, layer a batting square with a backing square, baste, quilt and trim to 24" square.
Note: I like to finish my pillows with zippers, because they're easy to remove to clean, and I can change out the pillow covers for different seasons. Here's a quick overview of adding a zipper; if you need more details, there are plenty of tutorials available. Step 5 Lay pillow front and back right sides together. Stitch along bottom edge with a long basting stitch. Press seam open. Position the zipper face down on the seam line. Use a zipper foot on your machine to stitch around all four sides of the zipper to secure in place.
Step 6 Use a seam ripper to pick out the basting stitch, revealing the zipper.
Step 7 Open the zipper. Place the pillow front and back right sides together, pin raw edges, and stitch around the remaining three sides. Step 8 Turn pillow right side out and poke corners out. Insert the 24" square pillow form.
Step 9 Repeat steps 5-9 with the second pillow top, back and zipper.
The beauty of Christmas in July? Think how nice it will be to pull these finished pillows out in December, either to use or to gift!
I hope you enjoyed this tutorial!
*************************************************************************************************
If you're new here, welcome! I hope you'll stay and look around a bit.
If you like what you've seen here, you can also find me:
To find all of my quilt patterns, visit my Etsy shop. Sign up for my newsletter in the right-hand sidebar or here. (You'll receive a free pattern for my Diamond Drama quilt (below) as a thank you!)