Friday, December 15, 2023

Holiday Hack #1

 As my helpful 9-year-old keeps pointing out, Christmas is in 10 days. 😬


And I'm starting to realize that I need to remove some things from my to-do list (but that's another post...!). But finishing up holiday gifts is staying on the list - and here's how!

So...you joined the Strippy Improv Holiday QAL with grand plans. And you've got one block pieced. The other three aren't going to happen in the next 10 days. So what can you do instead? Make a throw pillow! 


For me, it started with this fun coffee cup/hot cocoa mug fabric from Benartex's Country Christmas collection. Such cute fabric! Perfect for a pillow!

Here's a quick pillow tutorial:

Make your block - I chose to fussy cut one of those cute hot chocolate cups to use in my Strippy Improv Snowglobe block. 

I framed the block, just like in the pattern. Then I added 4-1/2" wide strips to the right and left sides, and then to the top and bottom. This creates a pillow front that is roughly 17" square. Cut a 17" backing square as well.

This HeatnBond Fusible Fleece 1 yard pack is perfect for creating a 16" square pillow because you can cut and fuse (2) 17" squares to the wrong side of your pillow front and back! I did straight line machine quilting to secure the fused batting in place, and then finished the pillow with a zipper.


That's it! If you have the block made already, you're halfway done! I assembled this pillow in 1 hour last night. Instant gift! (And then you can make the 4-block Strippy Improv Holiday quilt next year!)


Need the pattern? Get it here


Missed the QAL? Start here to catch all the tips I shared. 

And watch the YouTube videos here.


Thursday, December 7, 2023

Strippy Improv Holiday QAL - Week 4

 Can you believe it?!?! We're on the 4th and final week of the Strippy Improv Holiday Quiltalong! 
I hope you've had as much fun as I've had, maybe learned a few things, and are well on your way to a completed project! 


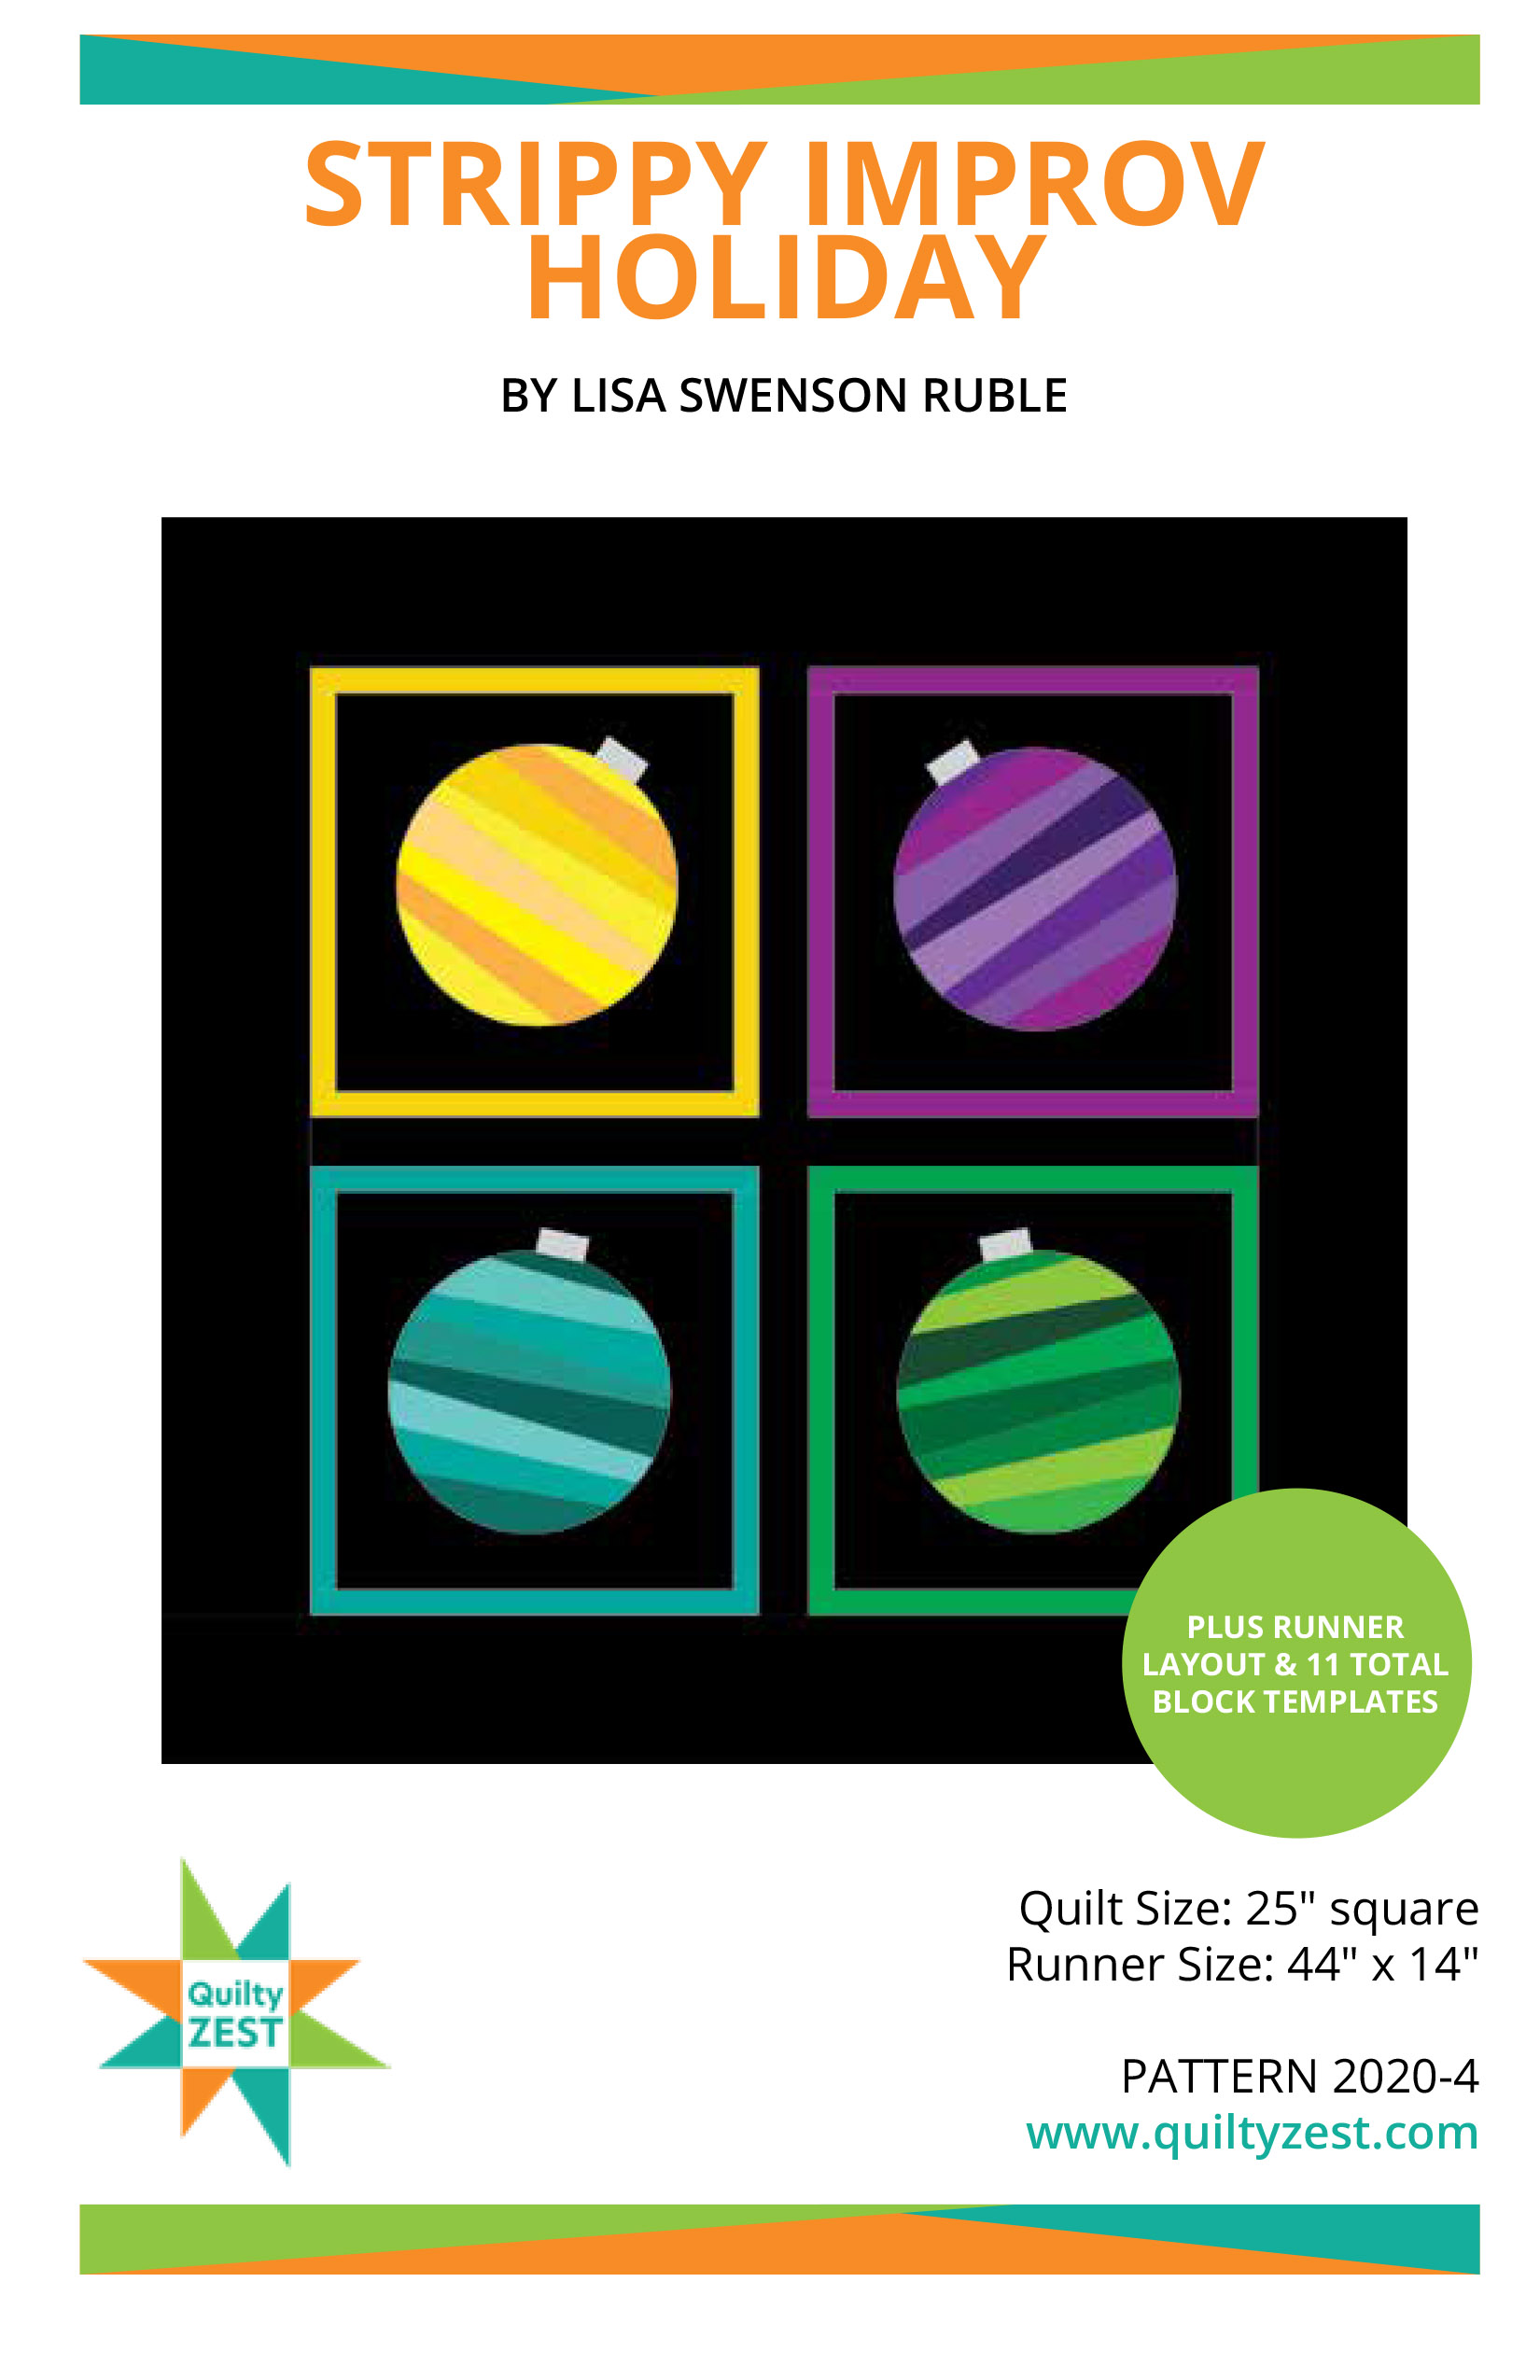
This week, we're talking Assembly and Finishing. The Strippy Improv Holiday pattern includes two finishing options - a 4-block wall hanging (see the image above), and a 4-block table runner. Of course, you're welcome to assemble your blocks however you like! 


Here are a couple of my assembly tips. Both of these tips come from the block frames and sashing being so narrow - that means that any slightly crooked sewing will stand out, because all these narrow strips are so close to each other. So here's what I suggest:

1. Pay attention to alignment. After you've joined your vertical sashing to 2 framed blocks to make a block row, you'll join the block rows to a horizontal sashing strip. To make sure the vertical sashing and block frames are lined up, fold the top block row down to double check alignment. When you're satisfied, pin on both sides of the sashing to ensure it stays in place as you sew. 


]
2. Sew with the skinniest strip on top. When you're adding borders, sew with the block/frame side on the top (and the border strip on the bottom). This allows you to make sure your frame is staying the same width as you stitch down the length of the quilt center - if the border strip is on top, you're sewing "blind" and just counting on your 1/4" seam allowance to be correct. Especially with narrow strips, this isn't always the case. Keeping the blocks/frames on top ensures that you can adjust as needed. 


Here's what my finished quilt top looks like (machine quilting to come, hopefully this weekend!): 


Speaking of machine quilting, let's talk quilting ideas. 

My go-to is straight line quilting, because: 
1. it's easy
2. it's quick
3. it creates texture rather than distracting from the quilt top

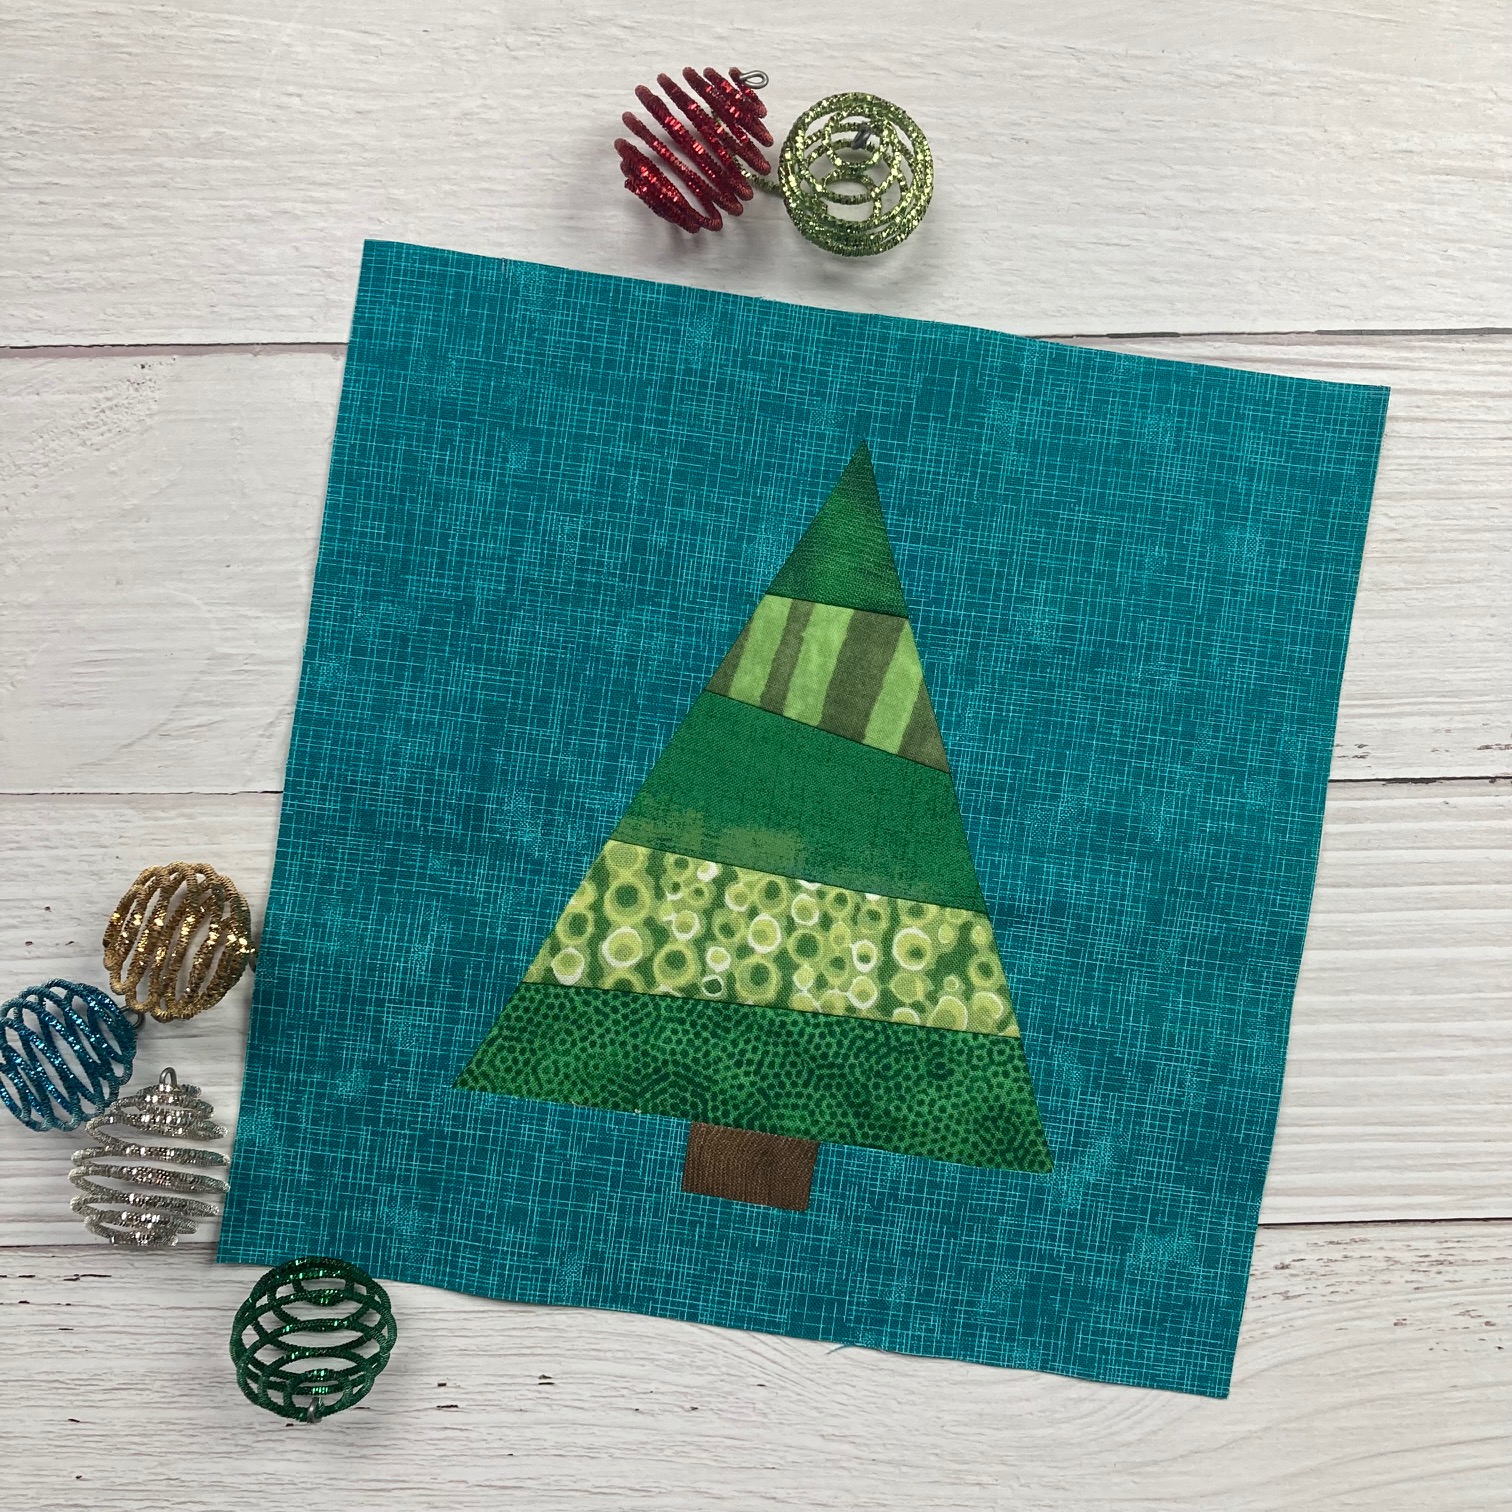
Here's an example of a wall hanging I made using straight line quilting. I did vertical lines in this version because of the vertical stripes in my block backgrounds. Typically I do horizontal, to go along with the "lines" of the strippy improv piecing. You can see the texture it creates without distracting from the design. 


This quilt was machine quilted by Diane Oakes. She outlined the little trees in the border and did some fantastic loops in the block shapes. I love the look of this type of quilting - it allows you to customize your stitches to your designs! 


No matter how you quilt your project, it'll turn out great, I'm sure!

For more info on assembly and finishing, watch this week's YouTube video.

So...what happens if your December is filling up with shopping, cookie making, holiday get-togethers and just the general crazy-busy-ness of life? That's when one-block finishes are key! 

You can transform one block into a throw pillow (example image coming soon - mine isn't done yet!), a mini quilt, a tote bag, or even a hot pad! Quick to finish, since it's just one block, and wonderful gift ideas!
Here are two mini quilts I made last December (on the day of my guild's Holiday Party with gift exchange, of course! Hooray for the last-minute folks!)


Find basic tutorials for transforming 1 block into a throw pillow or a tote bag here.


****************************************************************************

Join the Strippy Improv Holiday Quilt Along!
Get the pattern here. It includes all 11 blocks. If you've purchased the pattern previously, you can get the 6 new blocks for free - sign up for my newsletter here, and you'll receive an email with a link to download the new blocks. 

QAL Details: 
Sew along with me to create a holiday wall quilt or table runner before Christmas! I'll post once a week with tips and advice (plus that all-important accountability!) to keep us on track. These blocks are addicting...just wait and see! 
Purchase the pattern here.

Week 1: November 16th - Fabric and block selection
Week 2: November 23rd -  Making 2 blocks
Week 3: November 30th - Making 2 blocks
Week 4: December 7th - Assembly and Finishing

Thursday, November 30, 2023

Strippy Improv Holiday QAL - Week 3

 It’s Week 3 of the Strippy Improv Holiday Quiltalong! 


This week we’re making 2 more blocks - for a grand total of 4! Small quilts make it easy to stay on track in a QAL, especially in November/December! 

Last week, I talked about piecing the blocks and shared some tips for success. 
This week I’m focusing on adding the reverse applique block background. 

Here are my 4 best tips:
1. If you’re feeling like your background fabric might be just a little bit too light and your piecing might show through, don’t worry! There’s a solution! BEFORE you fuse your traced shape to the back of the fabric, fuse a piece of light interfacing. I like Thermoweb Lightweight Fusible Interfacing. Then add your shape on top and cut out - this extra layer helps to avoid fabric showing through.
 

2. Don’t forget to trim around your traced shape on the fusible adhesive. I often forget this step because I’m so excited to get to the point of adding the background! What I mean by this - after you’ve traced your shape onto the fusible adhesive square, cut out roughly 1” beyond your traced line. You don’t need to keep the entire fusible square on the back! Make sure you do this BEFORE you fuse it to your background square. 


3. After you cut out the shape on your background square, audition your placement. Move the background square up and down and side to side (slightly), and see which position creates the best looking block. And always make sure that your raw ends from the strippy improv piecing are covered!


4. Choose your decorative stitch and thread color carefully. So far, I’ve used 3 different stitches - a simple straight stitch along the edge of the reverse applique, a zig zag, and a buttonhole stitch. Any decorative stitch works, but here are the things I consider in making my choice. If this quilt will be used (table runner, as opposed to a less-handled wall hanging), I’ll generally choose zig zag because it’s sturdier. I like a loose zig zag in a thread color that coordinates with the block background so that it generally fades away instead of creating a bold outline, but that’s just me. Buttonhole stitch adds a certain charm, which works well with some fabrics (I think it would look fantastic on the holly and berries!). I’ll be honest, I often resort to straight stitch because it’s the easiest and the fastest. :) 


I’ve created a YouTube video this week as well - you can view it here. In addition to talking about adding the reverse applique block backgrounds, I offer a few more embellishment ideas (including some fun options for the snow globe!). 

Oh, and here's my finished snowman block!


Next week, we'll talk assembly and finishing! Can you believe we're almost done? 
(And if you're not caught up - no worries - next week I'll also share some ways to finish single block projects - great for gifts!


****************************************************************************

Join the Strippy Improv Holiday Quilt Along!
Get the pattern here. It includes all 11 blocks. If you've purchased the pattern previously, you can get the 6 new blocks for free - sign up for my newsletter here, and you'll receive an email with a link to download the new blocks. 

QAL Details: 
Sew along with me to create a holiday wall quilt or table runner before Christmas! I'll post once a week with tips and advice (plus that all-important accountability!) to keep us on track. These blocks are addicting...just wait and see! 
Purchase the pattern here.

Week 1: November 16th - Fabric and block selection
Week 2: November 23rd -  Making 2 blocks
Week 3: November 30th - Making 2 blocks
Week 4: December 7th - Assembly and Finishing

Thursday, November 23, 2023

Strippy Improv Holiday QAL - Week 2

 Hello and welcome back for Week 2 of the Strippy Improv Holiday Quiltalong! 


This week we're talking block creation. 

And if you haven't joined the QAL yet, you still can! Grab the pattern here and sign up for my newsletter to get weekly updates.


This week I'm sharing piecing tips about some of the blocks; next week we'll cover adding the reverse applique background. 

1. Use the cut out background shape as a guide while you piece. Even though the shape is traced on your muslin, it can still be hard to envision how the piecing will look. For this ornament, I wanted to have light blue at the top and bottom, with a "band" of colored strips in the middle. Before I added in the gold cap, I laid the cut out background square on top to test placement.


2. Think about fabric choice before you piece. For the stocking, I knew I wanted one fabric to be the stocking cuff at the top, so I planned out placement in advance, and also made sure that the last strip (the cuff) went fairly "straight" across the top so it looked more cuff-like. 


3. Now is the time to embellish. Want to "trim" your Christmas tree? I did this using decorative stitches on my sewing machine. Any stitching you do should be before you add the background square. Same with the gingerbread "frosting" on the arms and legs - check out this week's YouTube video for specifics on how to apply those. 


****************************************************************************

Join the Strippy Improv Holiday Quilt Along!
Get the pattern here. It includes all 11 blocks. If you've purchased the pattern previously, you can get the 6 new blocks for free - sign up for my newsletter here, and you'll receive an email with a link to download the new blocks. 

QAL Details: 
Sew along with me to create a holiday wall quilt or table runner before Christmas! I'll post once a week with tips and advice (plus that all-important accountability!) to keep us on track. These blocks are addicting...just wait and see! 
Purchase the pattern here.

Week 1: November 16th - Fabric and block selection
Week 2: November 23rd -  Making 2 blocks
Week 3: November 30th - Making 2 blocks
Week 4: December 7th - Assembly and Finishing

Thursday, November 16, 2023

Strippy Improv Holiday QAL - Week 1

 Hooray! 

The Strippy Improv Holiday QAL has started! This is my favorite time of the year, and the addition of 6 new blocks only makes it better. And this year, there's a giveaway for Week 1, so keep reading! If you don't have the pattern yet, get it here.

For Week 1, we're talking fabric and block choice. 

There's a lot to think about, and so many tempting directions to go! 


Fabric and block choice go hand in hand - and with the new blocks, you have many options for making a Christmas-themed project or a winter-themed project. 

I tend to find inspiration by fallling in love with a fun holiday border fabric. In fact, that's what attracted me to the Country Christmas collection (see the giveaway info below to win some!). Once I choose the border fabric, then I pick blocks that follow the theme. For the Quilt Along, I'll officially be using these fabrics, a combo of Cherry Guidry's Nordic Cabin prints and the white-on-white prints from Holiday Snow. 


The snowman heads will be my border, the dark gray the block background, and then I'll use the aqua for the frames and binding. A fun wintry wall quilt! 

Select your blocks - Either four different, all the same, or a couple of your favorites. The pattern includes options for assembling the blocks into a table runner or a square wall hanging. See some of my finished samples here.

Here are the new blocks:


And the original blocks:


Now let's talk block backgrounds. You'll want to choose a medium to dark fabric for the background. If you use a lighter fabric, the strippy improv will show through. Keep that in mind as you choose fabric for the strips - for example, if you have a dark gray background, make sure the snowman hat contrasts enough. Here's an example of a fabric choice where I didn't have quite enough contrast: 

Pick your fabrics and quilt blocks, and next week we'll make two blocks! 

Now for the giveaway info!

To celebrate this year's Strippy Improv Holiday QAL, I asked two companies whose products I love if they'd share a little product love with one lucky winner. 
The prize package includes:

A Thermoweb gift pack of the following items

I've been on the Thermoweb Design Team for several years - I recruited myself after trying their fusible on my first Strippy Improv blocks! I use the HeatnBond Lite Sewable Iron-On Adhesive for my constructing my blocks.

And this fabric bundle from Benartex's Country Christmas and Holiday Snow collections - FQs of holiday prints on the left, and border, binding and block background fabric on the right: 


I've been a Benartex Ambassador for the past year, and have regularly used their fabric for much longer. It was fun selecting the prints for this year's projects and giveaway!

How to enter: 
Make sure you're following me on Instagram (@quiltyzest) and leave a comment on the Week 1 QAL post. 
1. Let me know which Strippy Improv block is your favorite (1 entry)
2. Tag a friend who might be interested (1 entry)
The giveaway is open through Monday, November 20th at 11:59 pm EST. I'll randomly draw a winner from the entries and announce it on Tuesday. 


****************************************************************************

Join the Strippy Improv Holiday Quilt Along!
Get the pattern here. It includes all 11 blocks. If you've purchased the pattern previously, you can get the 6 new blocks for free - sign up for my newsletter here, and you'll receive an email with a link to download the new blocks. 

QAL Details: 
Sew along with me to create a holiday wall quilt or table runner before Christmas! I'll post once a week with tips and advice (plus that all-important accountability!) to keep us on track. These blocks are addicting...just wait and see! 
Purchase the pattern here.

Week 1: November 16th - Fabric selection
Week 2: November 23rd -  Making 2 blocks
Week 3: November 30th - Making 2 blocks
Week 4: December 7th - Assembly and Finishing


Wednesday, November 15, 2023

Strippy Improv Holiday QAL!

It's the most wonderful time of the year....
Strippy Improv QAL time! 

And this year, it's bigger and better - I'm introducing 6 NEW block designs!

Need the pattern? Purchase it here.
Need to sign up for my newsletter so all the details come to your inbox? Sign up here. Signing up for the newsletter also gives you access to the 6 new blocks if you've already purchased the pattern. (If you're purchasing the pattern any time after 11/15, the new blocks are included in the pattern.)

Here are the blocks: 
Gingerbread

Holly & Berries

Snow Globe

Snowflake

Stocking

Traditional Tree


The basics are below - watch for the Week 1 post on Thursday, November 16th!
Psst...it includes info about a fantastic giveaway that you can enter! 

Quilt Along Schedule
Thursday November 16: Fabric and block selection
Thursday November 23: Make 2 blocks
Thursday, November 30: Make 2 blocks
Thursday, December 7: Assembly and Finishing


Wednesday, November 8, 2023

Venetian Marble Strip Runner


Hello! I'm here today sharing my Q4 Benartex Ambassador project - a jewel-toned table runner made from pre-cut strips! 


I chose the Venetian Marble prints because I've always loved the look of fancy scrapbook paper with marbleized effects and I thought it looked just as pretty on fabric! Here's what the Strippie (2-1/2" precut strip) pack looks like: 

Of course, I arranged them into a full rainbow!


I paired these colorful strips with black solid to create a stained glass effect. The black really makes the colors pop! 


The piecing creates a herringbone effect, accentuated by the pointed ends on the runner. 


The hardest part was narrowing down which strip colors to use!

How can you make this runner?!?
The tutorial for creating this table runner is available on my Subscribers Only page. For access, sign up for my newsletter here. If you're already a newsletter subscriber, you'll find the link in the latest newsletter (bookmark it for easy access!).


 **************************************************************************
If you're new here, welcome! I hope you'll stay and look around a bit. 
If you like what you've seen here, you can also find me:
To find all of my quilt patterns, visit my Etsy shop
Find me on IG here.
Sign up for my newsletter in the right-hand sidebar or here
(You'll receive a free pattern for my Diamond Drama quilt (below) as a thank you!)