Thursday, September 28, 2023

Week 2 - Strippy Improv Halloween QAL

Welcome back for Week 2 of the Strippy Improv Halloween QAL! 

It's block making week! 
The beauty of a 4-block quilt is that once you have 2 made, you're halfway done! 

Thanks for weighing in on which of my four mocked up versions I should make. I chose #1, but you might see some blocks from #4 make an appearance down the road. Here's my mock up, made using the Glow-O-Ween fabrics from Benartex. 


And did I mention this fabric GLOWS IN THE DARK!?!?!

And here are my first two blocks:


Which blocks have you decided to make? Let me know in the comments. 

I've got 4 block making tips for you today: 
Tip 1: 
If you're using a non-symmetrical block (like the pumpkin with its stem, for example), make sure that when you trace the shape onto the fusible web, it's reversed from when you trace the shape onto the muslin. If you're using a symmetrical shape (like the spider, don't worry about this.)


Tip 2:
I recommend placing an iron an cutting mat adjacent to your sewing machine for block making. These blocks assemble with a press and cut after every seam, so you'll enhance your efficiency if everything you need is together. 


Tip 3: If you accidentally cut through the muslin when you're trimming strips, don't worry! I've done it as well. Just keep sewing - the hole in the muslin will be covered. 

Tip 4: 
If your fabric marking pen erases with heat, consider using pencil to trace your templates onto muslin. Otherwise your traced shape on the muslin will disappear as you add strips. 


What comes next: 
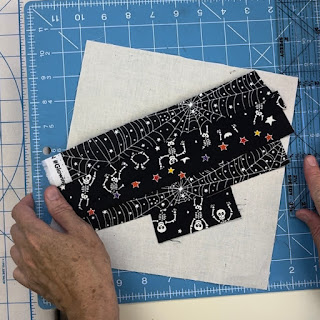
If you've completed the strippy improv piecing part and wondering if your blocks look "right," here are what mine looked like after piecing. After you cut out the reverse applique background and fuse in place, you can trim the excess. Note that for the bat, I pieced the strips on an angle. Choose your strip direction based on how you want the final block to look. 


If you learn better by video, I have a YouTube video showing this same technique used for my Holiday pattern. You can find it here. I also shared a reel showing me making the pumpkin block on Instagram (@quiltyzest).


Have fun making your first two blocks! Meet me back here on Thursday, October 5 where I'll be sharing my other two blocks. 

Here's the QAL schedule: 
Thursday 9/21: Fabric and block choices
Thursday 9/28: Make 2 blocks
Thursday 10/5: Make 2 blocks
Thursday 10/12: Assemble and finish!

I hope you'll join in the fun! I'll be posting here on the blog and also sharing posts on IG (@quiltyzest). If you're going to sew along, use the hashtag #strippyimprovhalloween to share your block and/or fabric choices!

Ready to join the fun? Order just the digital Strippy Improv Halloween pattern here
The pattern includes 9 block choices plus both a square wall hanging and table runner option.


Thursday, September 21, 2023

Week 1 - Strippy Improv Halloween QAL

Hi! I'm excited that it's Halloween season, and time for the Strippy Improv Halloween QAL!

If you still need the pattern, you can order it here.


We're talking fabric in week 1!

But really, before that, let's talk block choices, because the blocks you decide to make will steer your fabric choices. 

The pattern includes 9 different blocks (yes, I got carried away when I created the pattern, but what could I leave out?!?). I'm showing all 9 here - you can use this as an overview, and you can also refer back to them as you read the fabric choice section below. 

Pumpkin


Black Cat


Ghost


Spider


Candy Corn


Bat

Witch Hat


B-O-O


Select 4 different blocks, or use all the same block, or maybe 2 and 2. It's up to you! 

Here's where color factors in. 
Block background:
Your block background should be dark (or darker) so the pieced strips don't show through the reverse applique. If you choose appliques that are typically black or very dark (like the bat, cat, spider, witch hat), you'll want to pick a block background that is light enough to create contrast (but not too light, like white!). I wouldn't go lighter than this light gray below.


Strip colors:
These blocks are great for using scraps, particularly leftover strips. I recommend paying attention to the value of your strips - for example, for the pumpkin, you want your oranges to have enough variety that the individual strips stand out. Otherwise, you could just use one piece of orange for the whole pumpkin. 

I personally prefer prints that are more tonal, because I don't want individual prints distracting from the overall applique. But if you are making four pumpkin blocks, a little more variety might be fun! In my B-O-O blocks, I used more variety because I knew the letter would pop off the background. 

A note on whites and blacks - these can be tricky, because so many black prints read as black. Look for some darker grays as well (as long as they're darker than your block background). For whites, definitely raid your low volume stash! 

Whatever strips you choose, audition them by laying the strips together to see if you like the look. 

And finally, take advantage of all the fun Halloween prints in quilt shops for the border! For this year's Quilt Along, I'm using the Glow-O-Ween fabrics from Benartex. Aren't these fun? I'm so grateful to whoever decided at some point that purple and lime green are Halloween colors. It really adds variety to the idea of a Halloween palette.


Here's one of the mock-ups I'm considering. Yes or no on the purple background? 

Have fun choosing your blocks and fabrics! Meet me back here on Thursday, September 28 where we'll talk about making the blocks. 

Here's the QAL schedule: 
Thursday 9/21: Fabric and block choices
Thursday 9/28: Make 2 blocks
Thursday 10/5: Make 2 blocks
Thursday 10/12: Assemble and finish!

I hope you'll join in the fun! I'll be posting here on the blog and also sharing posts on IG (@quiltyzest). If you're going to sew along, use the hashtag #strippyimprovhalloween to share your block and/or fabric choices!

Need the pattern? Order it here

Friday, September 1, 2023

5 Panel Cutting Tips + Star Stacks My Hero quilt reveal!

Sometimes when you see a fabric, you know exactly what to do with it! That's how I felt when I saw the My Hero panel from Benartex - these fun comic strip-style blocks would be perfect centers for the star blocks in my Star Stacks pattern! (psst...the pattern is on sale through September 4th...use this link!)


Today I'm going to share my Star Stacks My Hero quilt and share my 5 tips to make fussy cutting blocks from a panel easier.


Here's the quilt - don't you love those bright colors? I love the positive messages of these prints - they make such a fabulous kids quilt!

A big thanks to my mom, who pieced this quilt for me. Next up? Quilting it! 

So let's talk fussy cutting panels. If you've worked with panels before, you may have noticed that they're not always perfectly straight. This is nothing against the fabric company - it just happens when you're printing on something slightly stretchy and movable like cotton. Let's look at how to combat that as you cut. 

Tip 1: Examine the panel before cutting. Decide where you'll cut - look at the lines in the blocks. In this case, I'm cutting 6-1/2" squares, and that measurement falls within the outer white line, so that makes things easier. 


Tip 2: Spray and press. If the block you're looking to cut feels especially crooked, spray it (I use water, but you can use starch too) and use a hot iron. This can sometimes help straighten things up and make cutting easier. 

Tip 3: Remember your 1/4" seam allowance. Anything that falls within 1/4" of the edge of the cut square (like the top edge of the lightning bolt in the block below) will be cut off. I'm ok with that here - but it's better to know in advance than realize what will be cut off after you've cut!

Tip 4: Align the ruler and find your "best" lines. Note that your best lines aren't always perfect, nor necessarily lined up with other printed lines. In the example below, I'm cutting off the outer white line, so I'm more concerned with how straight the blue border looks under my ruler than where the white line is. I want roughly the same amount of blue border to show on all sides of my block, so that's my focus as I position the ruler. 


Tip 5: Stitch with the fussy cut square on top. Especially if the fussy cut square has a border, like mine, you want to keep an eye on the inner border edge as you stitch. If you can keep your stitch line parallel to the printed inner border line, your square will look as straight as possible. (Sometimes that means taking liberties with your 1/4" seam allowance...it's ok! We all do it from time to time!)

These tips will help you to more accurately fussy cut your squares. But even if your squares don't end up perfect, don't worry! When someone (especially a kid who loves super heroes!) looks at the full quilt, they won't notice any small crooked lines!


Do you want to make the Star Stacks pattern? 


Grab the pattern (20% off through September 4th!) here in my Etsy shop. 
Ask for the My Hero fabrics at your local quilt shop, or contact one of the quilt shops carrying the fabric using this store locator.