
I had leftover fabric from Christa Watson's Gridwork collection after making my Ebb & Flow quilt (scroll to the bottom to see it!), and with Valentine's Day around the corner, I couldn't resist creating a cute tutorial to share with you.
This 23" square XOXO quilt is the perfect size for a door; you could also use it as a table topper or wall quilt.

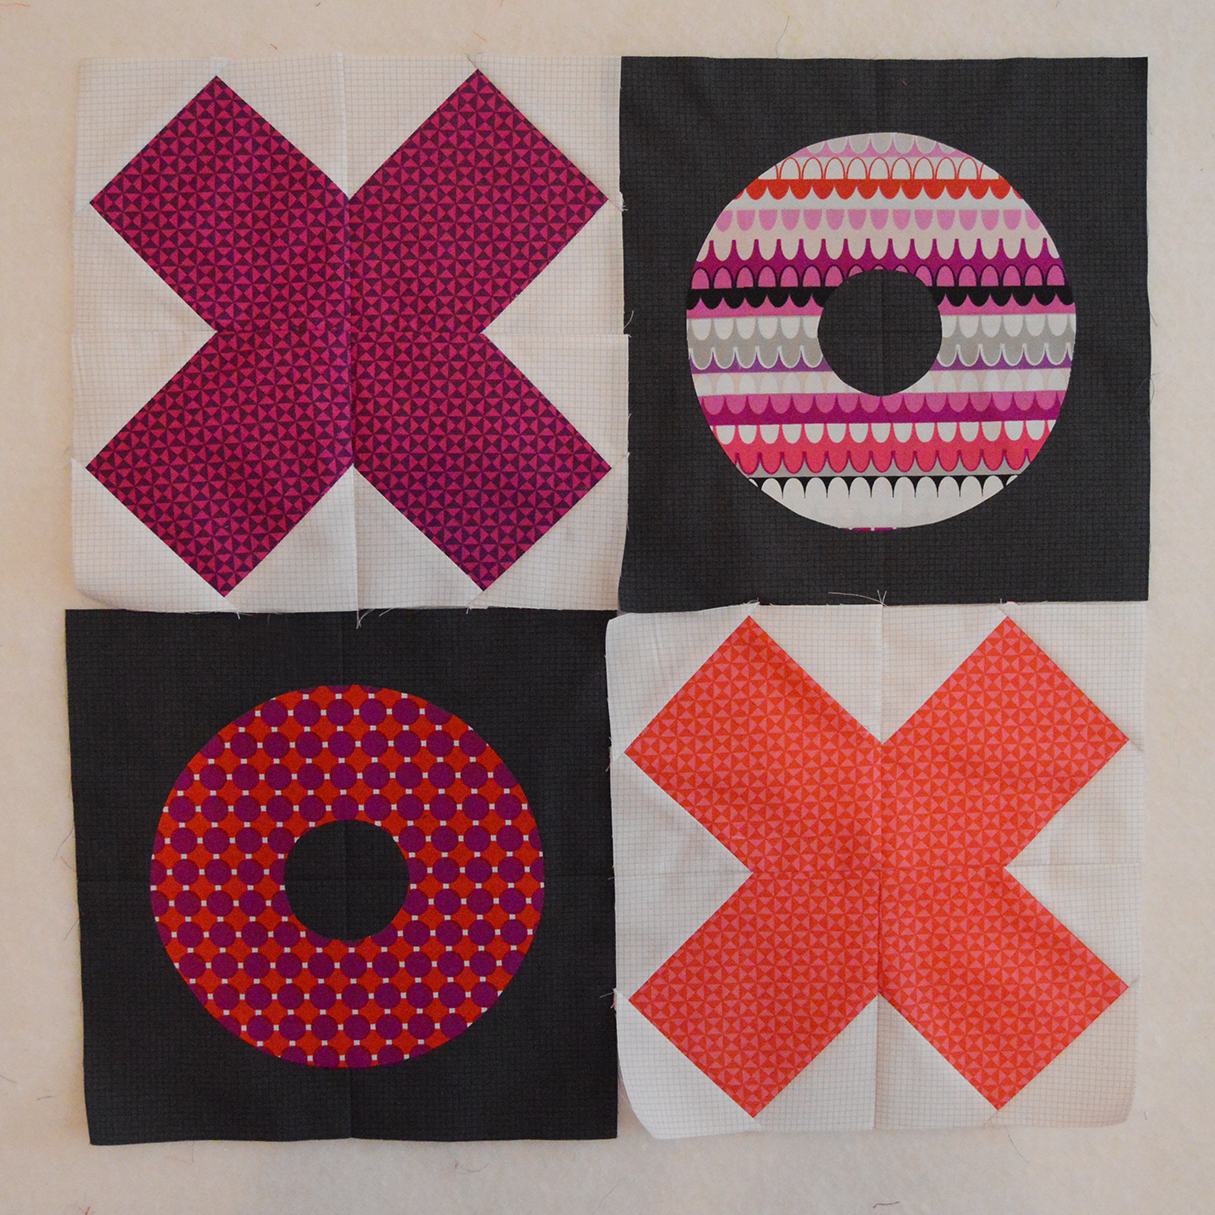
I picked my favorite pink, red and purple prints from Christa's collection, plus the black and white grid prints for background. Don't they match beautifully with my cutting board and rotary cutter? :)

Let's get started!
You'll Need:
- 1 fat quarter each of Purple Hourglass, Red/Purple Circle Grid and Fuchsia/Multi Arches prints
- 1/2 yard each Red Hourglass, White Square Grid and Black Square Grid
- 3/4 yard backing fabric
- 25" square of batting
- Fusible webbing
Cutting:
From the Purple Hourglass print:
(4) 5-1/2" squares
From the Red Hourglass print:
(4) 5-1/2" squares
(3) 2-1/4" x WOF strips for binding
From each of the Circle Grid and Arches prints:
(1) 9" square
From the White Square Grid:
(24) 3" squares
(2) 2" x 10-1/2" pieces
(2) 2" x 12" pieces
From the Black Square Grid:
(2) 10-1/2" squares
(2) 2" x 10-1/2" pieces
(2) 2" x 12" pieces
Download the "O" template here.
Make the Quilt:
1. Draw diagonal lines on the wrong side of (3) 3" White Grid squares. Position (2) marked squares right sides together on (1) 5" Purple Hourglass square as shown. Sew on the drawn lines, trim seam allowance to 1/4" and press open.

2. Position the third marked square right sides together on the unit from step 1 as shown. Sew on the drawn line, trim seam allowance to 1/4" and press open to make one quarter block unit.

3. Repeat steps 1 and 2 to make a total of (4) quarter block units. Lay out the unit as shown. Sew them together in pairs and then join the rows to make one 10-1/2" square "X" block. Tip: Pin at the purple/white seam so that your points match.

4. Repeat to make a second "X" block using the Red Hourglass squares.

5. Trace the "O" shape onto the paper side of fusible web. Cut out roughly around the shape and fuse onto the wrong side of the Red/Purple Circle Grid square. Cut out on the drawn lines (don't forget to cut out the center!). Tip: Loosen the edge of the fusible web paper before cutting the shape out. This prevents fraying as you separate the paper from the finished cut shape.

6. Fold (1) 10-1/2" Black Grid square in half in both directions and press to locate the center. Fuse the "O" onto the square, using the pressed lines to center it.

7. Repeat steps 5 and 6 to make a second "O" block using the Fuchsia/Multi print for the "O".

8. Lay out the (2) "X" and "O" blocks as shown. Sew the blocks into rows and join the rows to complete the quilt center.
9. Sew (1) each 2" x 10-1/2" Black Grid and White Grid pieces short ends together. Make (2). Sew (1) each 2" x 12" Black Grid and White Grid pieces short ends together. Make (2).
10. Sew the shorter pieced strips to the sides of the quilt center, matching the center seams. Sew the longer pieced strips to the to and bottom, matching the center seams.

11. Layer the quilt top with batting and backing, baste, and quilt as desired. I used a wavy line computerized stitch on my domestic machine. Trim backing and batting even with the quilt top.
12. Use the (3) 2-1/4" x WOF Red Hourglass strips to bind the quilt. Add a hanging sleeve if desired.

Happy Valentine's Day!
I also used Christa's Gridwork prints to make a version of my Ebb & Flow quilt. You can make this quilt with 2-1/2" precut strips. Purchase the Ebb & Flow pattern here.

No comments:
Post a Comment