
It's week 3 of the Strippy Improv Halloween Quilt Along!
How are your blocks coming along?
If your life is anything like mine, the last couple weeks have sped by, and you can't believe it's already the second week of October. Halloween is coming!!

I 'm still planning to finish some of my blocks into a table runner, and I'll show you that next week.
But I also wanted a back-up plan - an idea for how to make a project from just one block in case time got short again. I chose to make two new pumpkin blocks, and I'm going to turn one into a throw pillow and one into a trick or treat bag. I'll share more details next week.
Let's start with one more tip - this is about block background placement. Play around with your block background before fusing it down to make sure you get the best combination of fabric, and also to make sure things like the stems show through correctly. Here are two "don't do it this way" examples:


Play around with your background and make sure it's exactly how you want it before you fuse in place!
*****************************************************
So back to my pumpkins - I decided they needed a little embellishment! When I stitched my pumpkin blocks, I wanted them to be jack o'lanterns instead. Aren't they adorable?!?! I just sketched my face shapes, but afterwards I created a pdf with similar faces to these for you to use. Download the pumpkin face templates here. Enjoy!
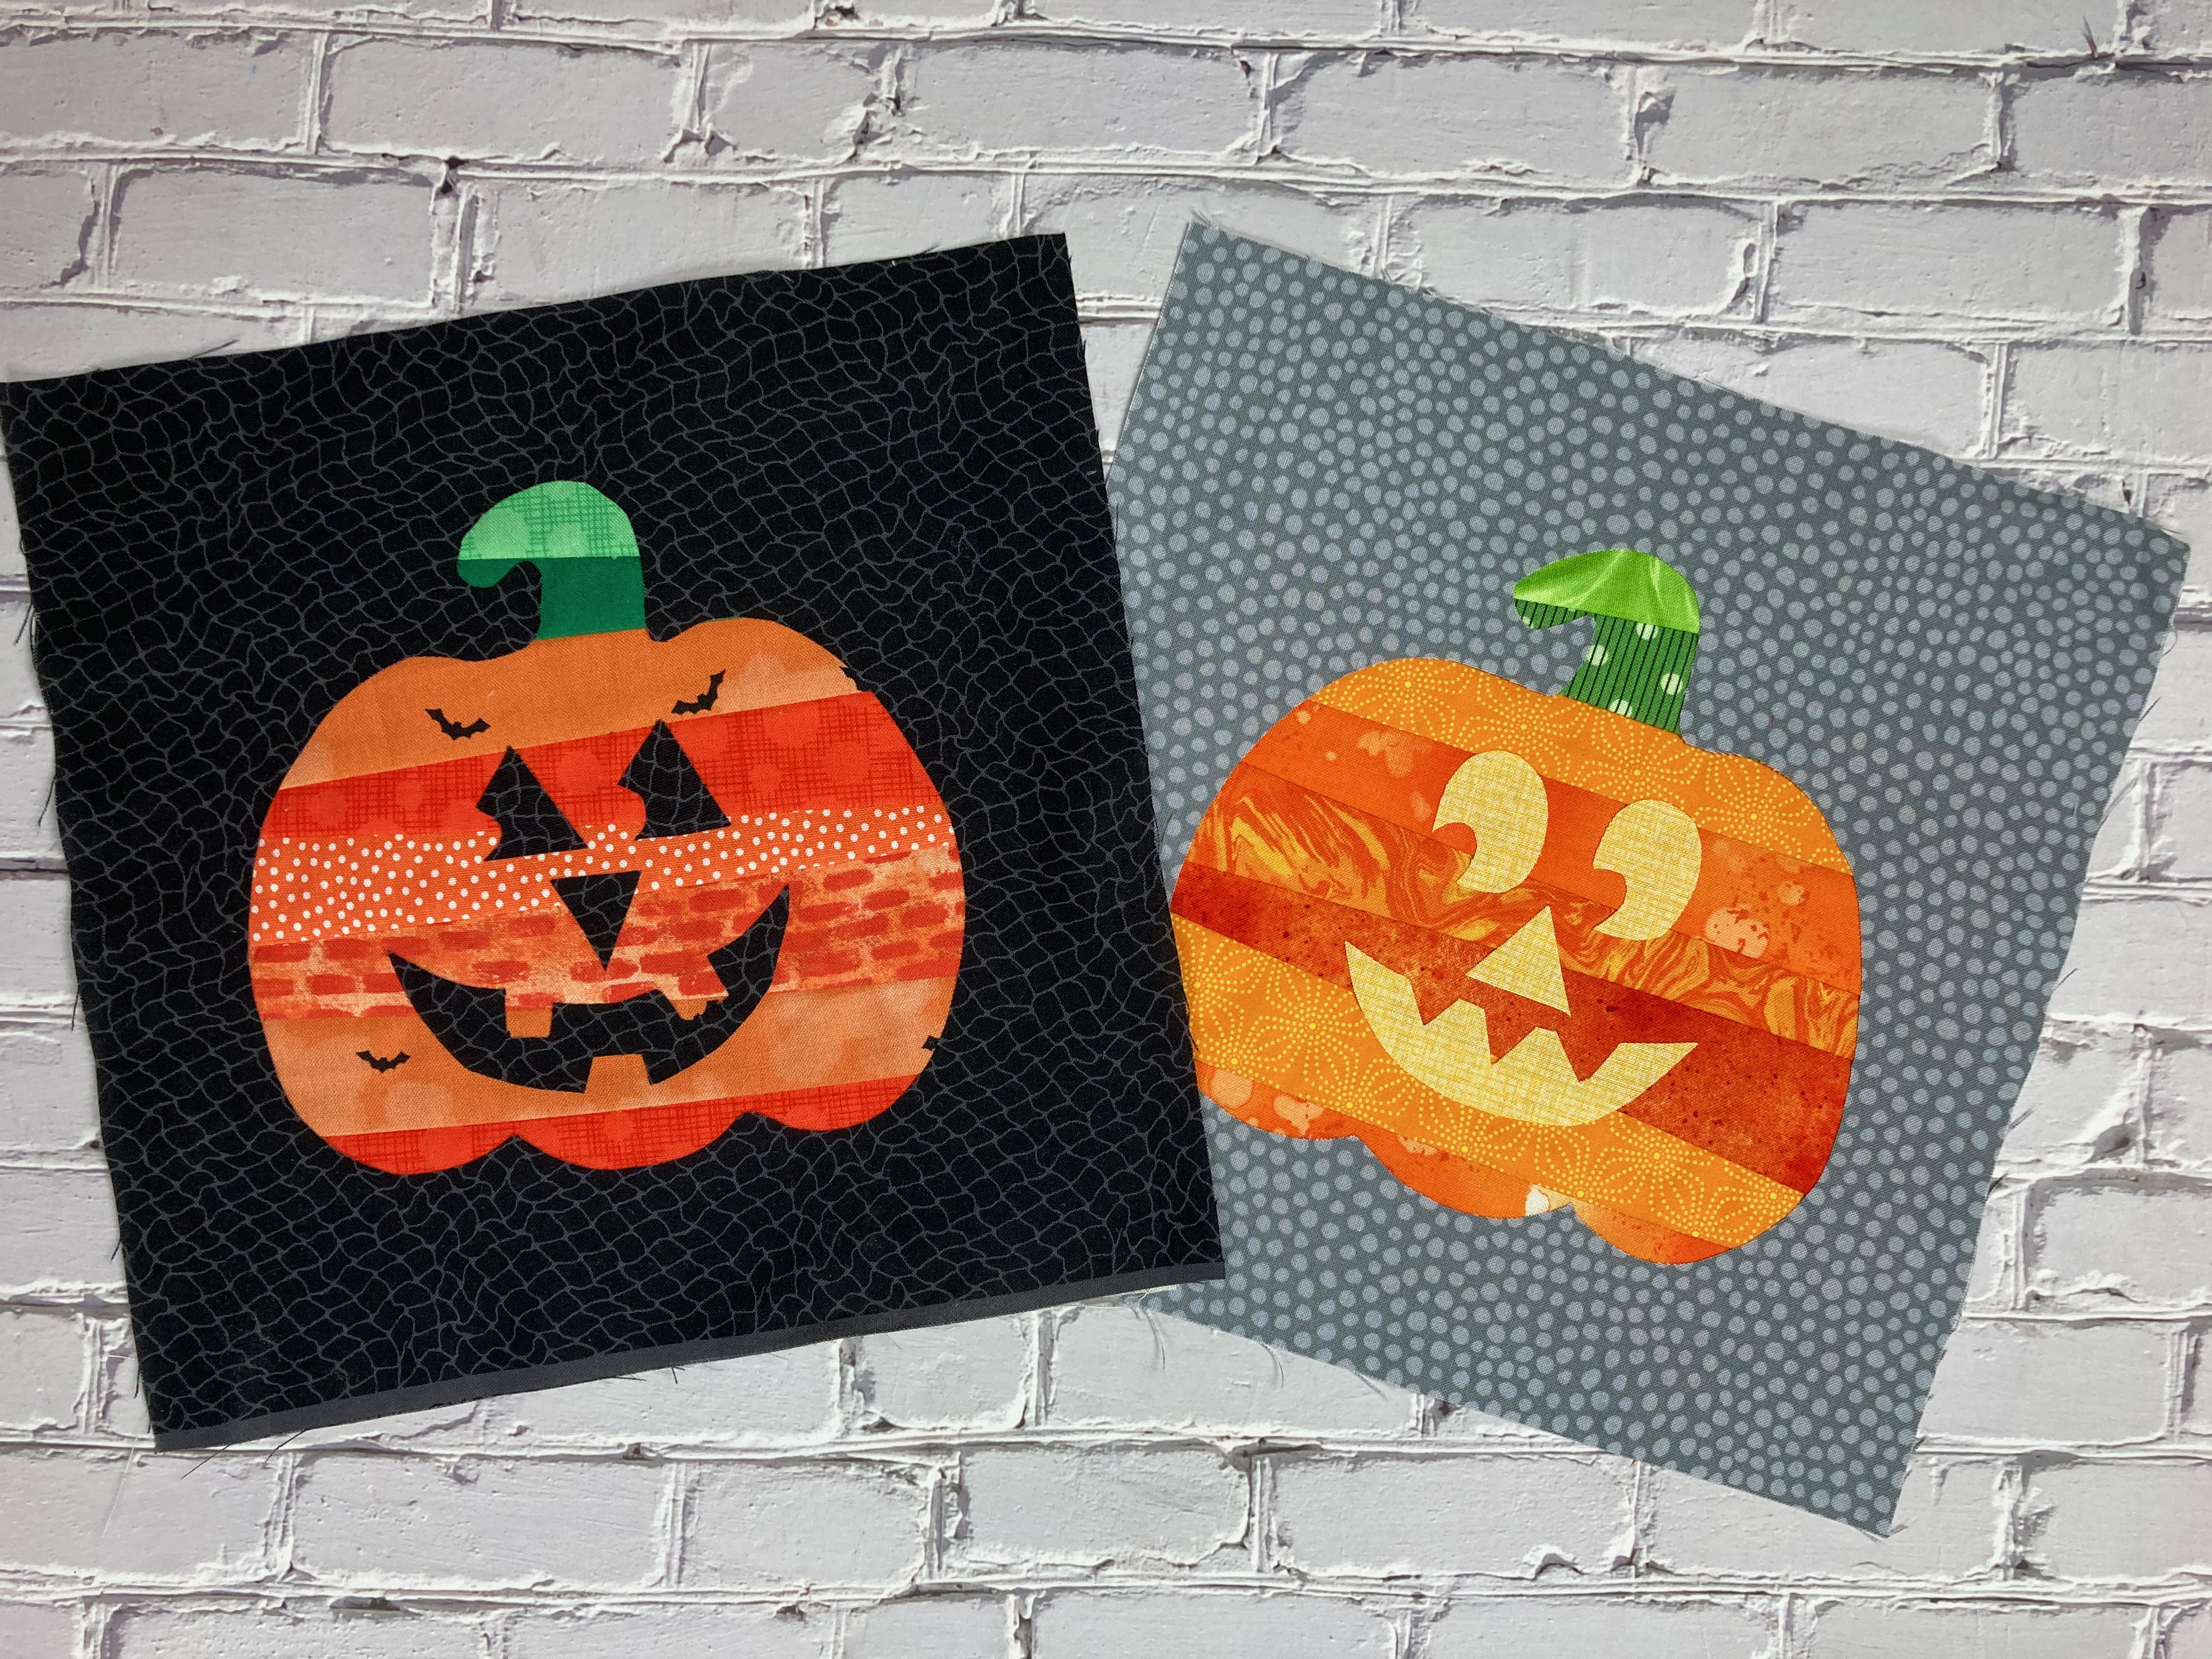
Since my pumpkin block has a black background, I knew I could use the fused pumpkin shape I cut out of the background for my eyes, nose and mouth. Easy!

 |
| These are more of the Michael Miller Halloween and blender fabrics I used for my wall hanging above. |
I also made a second pumpkin block, so I decided to try yellow eyes, nose and mouth so that this jack o'lantern looked like it was lit up. I like them both!

If you add a face to your pumpkin, make sure to stitch down the appliques to secure them. Since you're fusing them to a pieced surface, they'll need those extra stitches.
Next week, we'll talk about runner and wall hanging assembly (and the tote and pillow!).
Until then, enjoy sewing your strippy improv blocks!
Need the full Strippy Improv Halloween Pattern? Purchase the digital pattern here.
If you're new here, welcome! I hope you'll stay and look around a bit.

I love the pumpkin face. Thank you for the download.
ReplyDelete